
VMware Workstation is a desktop virtualization tool created by the company VMware; it can be used to set up a test environment in order to develop new software, or to test the complex architecture of an operating system before actually installing it on a physical machine. (Wikipedia)
#vm #vmware #system #virtualization
Part One - Creating a virtual machine
1. Open VMware.
Installing a virtual operating system amounts to installing it on an ordinary PC. You will need the installation disc or the ISO image for the operating system you want to install.
You will be able to install most Linux distributions as well as any version of Windows.
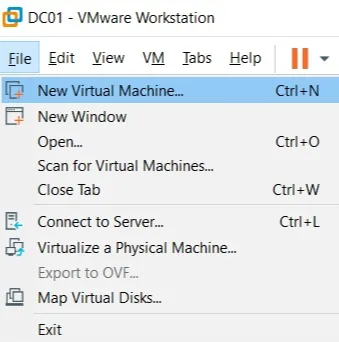
-> Creation
Click on File. Select New Virtual Machine.
When you start the wizard, you are invited to select a standard (typical) or a custom (custom) configuration.
The typical configuration will be presented first; it is the shortest configuration, recommended in order to get started more simply and quickly.
Note: Select a custom configuration if you need to carry out one of the following hardware customizations:
- Set the number of processors as well as the amount of RAM used.
- Create a virtual machine whose Workstation Pro version differs from the default hardware compatibility setting.
- Select the I/O controller type for the SCSI controller.
- Select the virtual disk device type.
- Configure a physical disk or an existing virtual disk instead of creating a new one
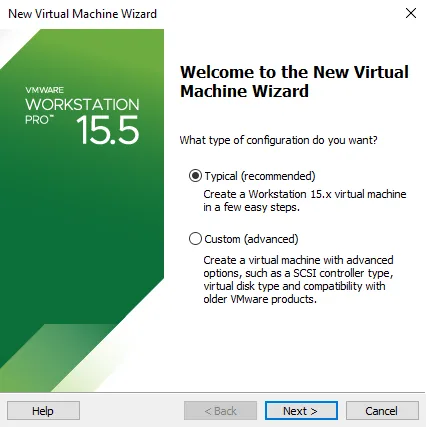
-> Standard configuration
Let us start with the typical (recommanded) configuration.
Select Typical, then press Next to move on to the next step
VMware will then ask you which installation medium you want to use.
There are 3 possible ways of carrying out the installation.
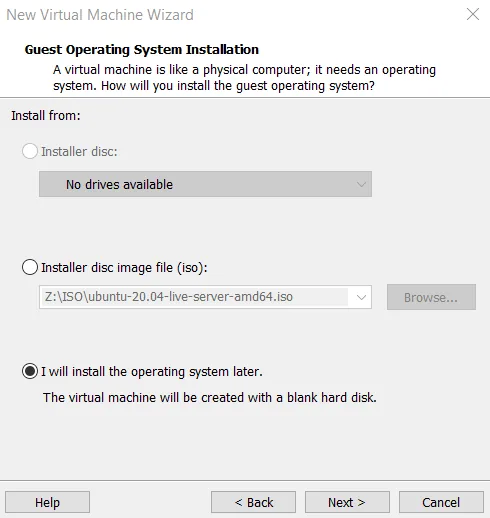
-> Installation medium
Installer disc: Lets you insert the installation disc of the operating system to be installed into your DVD drive (for example).
Installer disc image file (iso): Lets you browse to the location of an ISO file on your computer.
I will install the operating: Lets you create a blank virtual disk and carry out the installation of the operating system manually, without going through the pre-configuration step.
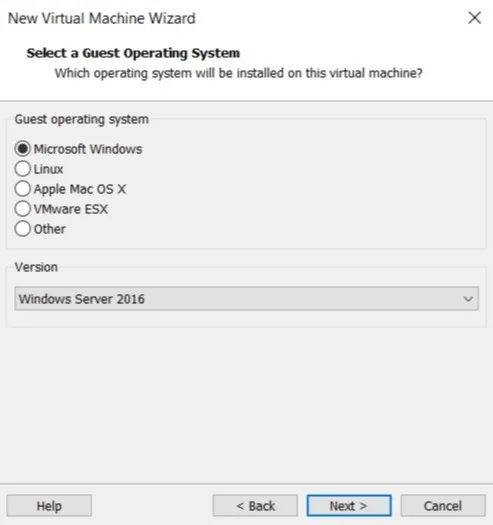
As a preference for the manual configuration of the system, I most often advise using I will install the operating system later.
-> Operating system
Select the operating system you want to install.
Note: If the version of your system is not listed, you can still choose an earlier version; it will work.
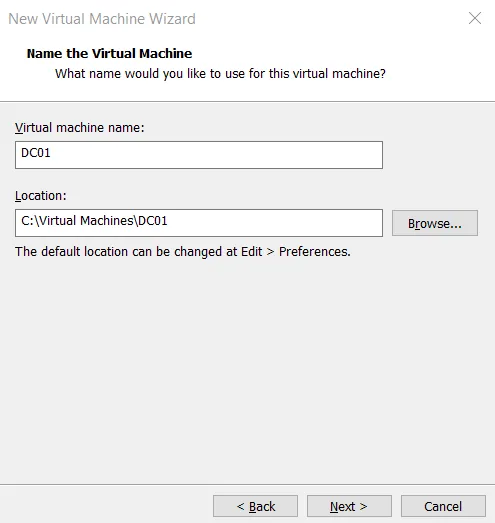
-> Naming the virtual machine.
The name will help you identify it on your physical computer. It will also help to tell apart several virtual machines running different operating systems.
Location: Lets you change the location where the files of the virtual machine will be stored.
Make sure you use the most suitable disk on your system. The main factor is often your free space.
Note: The name depends on your own use. Here DC01 (Domain Controller) refers to a Windows domain controller. I advise a naming scheme that combines at least the operating system and the service provided, for example: WIN-DC01, or WIN-WDS01 for a deployment server.

-> Setting the disk size.
You can allocate any amount of free space on your computer to the virtual machine, so that it acts as a hard drive for the operating system to be installed.
Make sure you set enough of it according to the intended use of your VM.
Note: The recommended values are enough for use in a test environment.
Windows: 60 GB
Linux: 20 GB
Note: 60 GB sets the limit imposed on the storage of the VM. The space used on your computer will not be 60 GB. It will depend on what your virtual machine actually weighs.
Windows Server: About 15 GB after installation
Linux Server: About 6 GB after installation
The Allocate all disk space now option makes it possible to allocate all the virtual disk space rather than letting the disk space grow gradually up to the maximum size of the disk.
I advise the Store virual disk as a signe file option. For my part, it is more pleasant to have a single file (.vmdk) to manage rather than a multitude of small files.
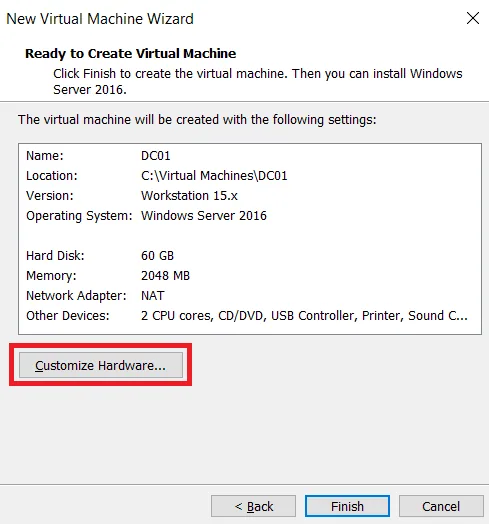
-> Customize Hardware
It makes it possible, among other things, to insert the installation image of the system. (if this has not already been done)
This last window summarizes the configuration of the virtual machine.
It is still possible to change these settings before carrying out the creation. I strongly advise checking them.
Note: These settings can always be changed, even after the creation.
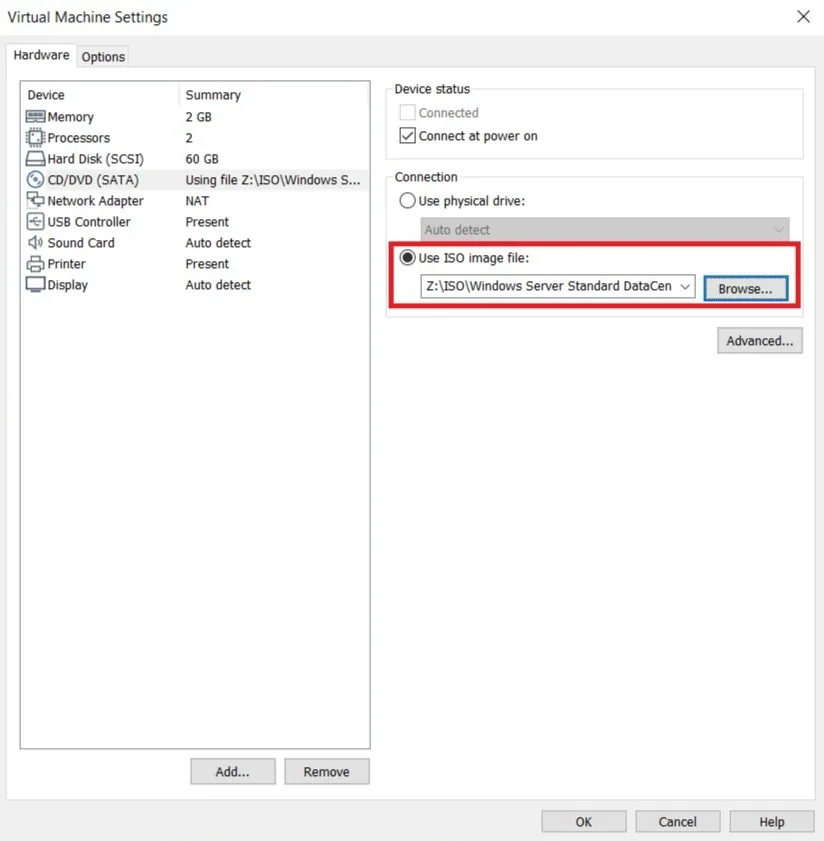
CD/DVD (SATA): The virtual CD/DVD drive will let you carry out the installation from a disk image (ISO)
Use ISO Image file: Browse to the location of the ISO file on your computer using the Browse button.
Once the disk image has been correctly inserted into the CV/DVD drive, you have finished creating your VM. To do so, press OK then Finish.
-> Starting the virtual machine:
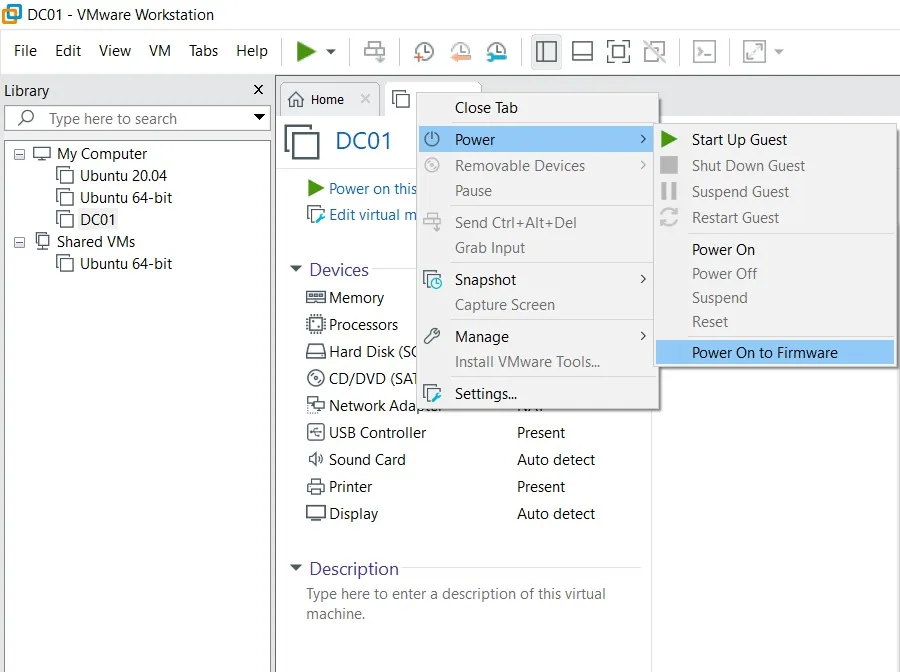
Note: For recent systems using UEFI rather than BIOS, I advise booting directly on the firmware in order to carry out the installation. Use the Power on to Frimware. option
This will save you from having to press a key on the keyboard within the first 3 seconds in order to reach the installation disk image.
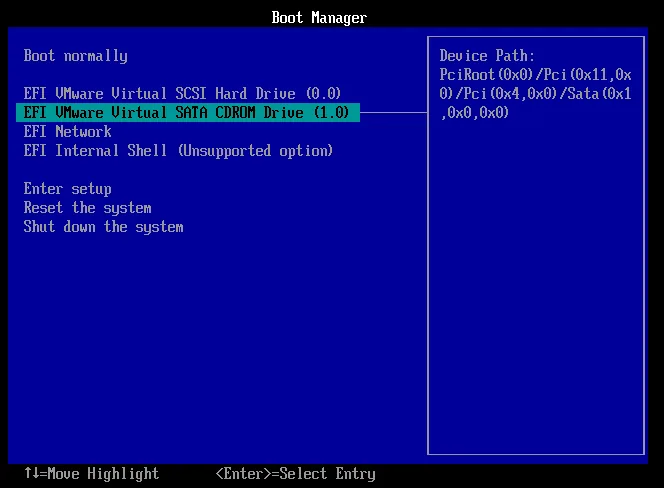
Once the machine has started, select EFI VMware Virtual SATA CDROM Drive to continue to the installation of the system.
Troubleshooting: If nothing happens or if no installation medium is detected, please check in the settings (Settings...) of your VM that the Connected at power on option is indeed checked for the drive (CD/DVD SATA).
In the future, you can simply start it using the Start Up Guest. button
There you are. You will soon find further details about the creation and the management of different types of virtual machines.
Thank you and see you very soon.