
GLPI is an ITSM or, in other words, an IT Service Management tool that ensures excellent management of your IT assets, your inventory, and the helpdesk.
We will cover the steps of installing GLPI on Ubuntu in the following sections. Before you can follow this guide, you must have an installation of a Linux system, preferably Debian 11/12 or Ubuntu 22/24, and a user account with administrator privileges or access to the sudo command.

Prerequisites
Updating the available packages
Let's start by updating the server.
First you have to retrieve the list of packages to update with:
sudo apt updateInstallation of PHP and Apache
We need a web server with PHP and Apache installed for GLPI to run and to be accessible from a web interface. Let's start with PHP and its many extensions needed for GLPI to work properly.
sudo apt -y install php php-{curl,gd,imagick,intl,apcu,memcache,imap,mysql,cas,ldap,tidy,pear,xmlrpc,pspell,mbstring,json,iconv,xml,gd,xsl,zip,bz2}Let's then install Apache as well as its PHP module.
sudo apt-get -y install apache2 libapache2-mod-phpInstallation and creation of the database
GLPI requires a relational database to store its data. Let's install MariaDB, which is a better-optimized fork of MySQL! (Do not do this if MYSQL is already present on your server!)
sudo apt -y install mariadb-serverAfter the installation, connect to your database as the root user.
sudo mysql -u root -pLet's create a database and a user for GLPI.
CREATE DATABASE glpidb;

CREATE USER glpiuser@localhost IDENTIFIED BY 'glpistrong7!';

GRANT ALL PRIVILEGES ON glpidb.* TO glpiuser@localhost;

FLUSH PRIVILEGES;

exit;
Installation of GLPI
Let's download the latest stable version. GLPI follows a semantic versioning scheme, on 3 numbers, where the first is the major version, the second the minor version and the third the patched version. Look for the latest stable version on the Downloads page. At the time of writing these lines, it is 9.5.7.
sudo apt-get -y install wget
export VER="10.0.11"
wget https://github.com/glpi-project/glpi/releases/download/$VER/glpi-$VER.tgz
Now let's decompress the downloaded archive.
tar xvf glpi-$VER.tgzYou then have to move the glpi folder into a more suitable directory; here we will use /var/www/html.
sudo mv glpi /var/www/htmlLet's give the Apache user owner rights on the directory.
sudo chown -R www-data:www-data /var/www/html/glpiIt is sometimes necessary to restart the apache2 service; we are going to do it as a precaution.
systemctl restart apache2Finalize the installation
On a web browser, go to the IP of your server or the URL of the host name followed by the /glpi directory.
If it is your local machine, you can use: http://IP_DE_VOTRE_SERVEUR/glpi.
- On the first page, select your language.
- Accept the terms of the license and click “Continue”.
- Choose “Install” for a brand-new installation of GLPI.
- Check the correct compatibility of your environment then click continue.
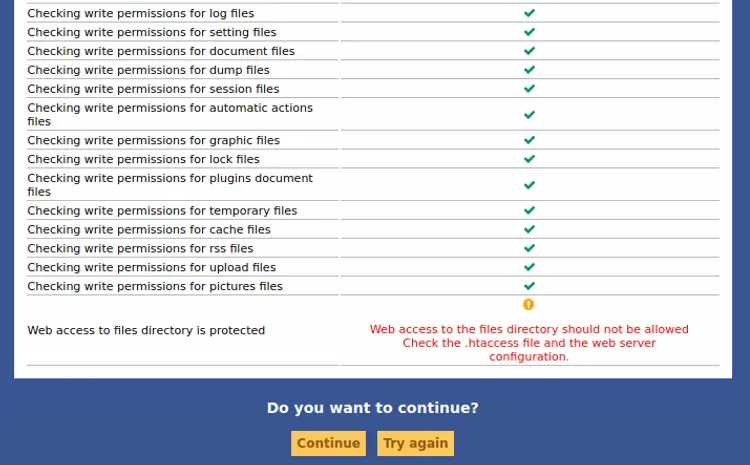
/!\ You can continue without necessarily clearing all the security warnings.
- Configure the connection to the database

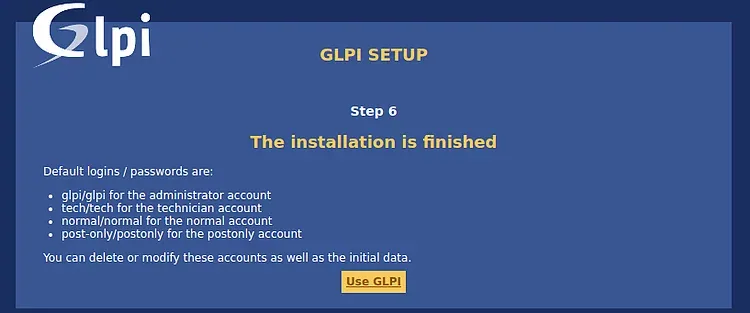
On the first connection, you are invited to change the password. Please set the new password before configuring GLPI. This is done in Administration > Users .
The default usernames and passwords are:
- User: glpi / Password: glpi for the administrator account
- tech/tech for the technician account
- normal/normal for the normal account
- post-only/postonly for the postonly account
You can delete or modify these accounts as well as the initial data.

Optional - Configuration of the domain with a VirtualHost
To access the site directly through a domain name it is necessary to make a Virtualhost.
nano /etc/apache2/sites-available/glpi.awoui.fr
<VirtualHost *:80>
        DocumentRoot "/var/www/html/glpi"
        ServerName glpi.awoui.fr

        ErrorLog ${APACHE_LOG_DIR}/glpi.error
        CustomLog ${APACHE_LOG_DIR}/glpi.access combined

        <Directory /var/www/html/glpi/>
            Require all granted
            Options FollowSymlinks MultiViews
            AllowOverride All

           <IfModule mod_dav.c>
               Dav off
           </IfModule>

        SetEnv HOME /var/www/html/glpi
        SetEnv HTTP_HOME /var/www/html/glpi
        Satisfy Any

       </Directory>

RewriteEngine on
RewriteCond %{SERVER_NAME} =glpi.goankh.com
RewriteRule ^ https://%{SERVER_NAME}%{REQUEST_URI} [END,NE,R=permanent]
</VirtualHost>
Save, exit, then enable the site at the Apache level:
a2ensite glpi.awoui.fr.conf
systemctl restart apache2
To follow: LDAP configuration for GLPI
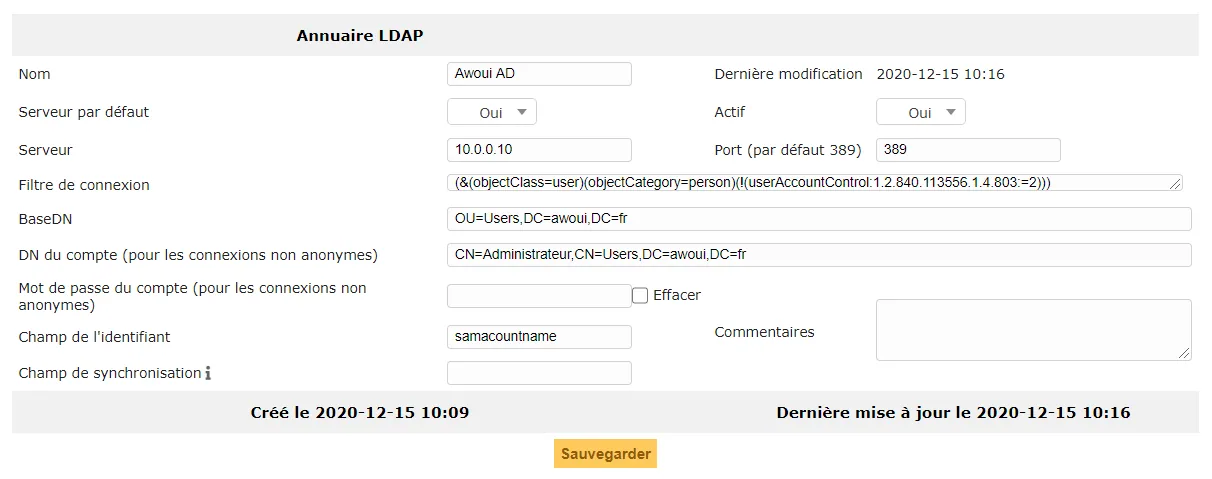
Configuration of the LDAP connection with Active Directory
Name (purely indicative): Your AD Server
Default server: yes Active: yes
Server: 10.0.0.10 (IP address or Name of the AD server) Port: 389
Base DN: ou=Users,dc=awoui,dc=fr
Account DN: cn=Administrateur,cn=Users,dc=awoui,dc=fr
Password: (Password of the Administrator on Windows)
field: samacountname
What to do next?
Creation of the Equipment Categories:
Create different equipment categories, such as Computers, Phones, Printers, Routers.
Adding Equipment:
For each category, add at least three pieces of equipment with varied characteristics and locations (for example, computers in Toulouse, printers in Montpellier).
Assignment of Equipment:
Assign this equipment to different users or departments.
Creation of the Consumables List:
Add consumables such as ink cartridges, network cables, and mice.
Stock Management:
Manage the stock of these consumables, indicating the available quantities and the storage locations.
Failure or Problem Scenarios:
Create different tickets representing common problems (for example, a broken printer, a network connection problem, a failing piece of software).
Assignment and Tracking of Tickets:
Assign these tickets to members of the support team and track their resolution.
Problem Resolution:
For each ticket, describe the resolution steps, including the actions taken and the solutions provided.
Documents were attached to the original article (“Configuration LDAP pour GLPI (Active Directory).pdf”): the download widget of the former editor did not carry them into the archive, and they are not republished.