
Nextcloud stands out as a versatile open-source solution. To make the most of this platform, it is essential to set up a robust installation and to strengthen security. This article will guide you through the process of installing Nextcloud on your server, with particular emphasis on the secure use of the popular Nginx web server.
Prerequisites
- A server running a Linux distribution (for example Debian, Ubuntu).
Step 1: Installing the packages
1. Update the package source
- sudo (Super-User Do) makes it possible to run commands as root
- apt (Advanced Packaging Tool) is the package manager used
- update updates the list of available packages
2. Install the Nginx web service
- nginx is a web service recommended for its security and its performance
3. Install PHP and the required extensions
- php-fpm is an alternative to php offering much better performance
sudo apt install php8.2-{fpm,bz2,curl,mbstring,intl,cli,zip,xml,imagick,mysql,gd}4. Install the MariaDB database
- mariadb is a better optimized fork of mysql
Step 2: Setting up Nextcloud
7. Download the latest version of Nextcloud
- cd (change directory) makes it possible to change directory
- /tmp is the directory used for temporary files
- wget (web get) makes it possible to obtain/download the content of a web page
8. Extract the folder to its directory
- unzip makes it possible to extract the content of a file archived in .zip format
- mv (move) makes it possible to move a directory to another location
- /var/www is the directory used to store web files. For security reasons, it is recommended not to use /var/www/html
9. Change its owner to www-data
- chown (change owner) makes it possible to change the owner of a directory
- www-data is the system user used by web services such as Nginx
- -R indicates recursion, so that the permissions are applied to the child directories.
Step 3: Configuring the database
10. Connect to MariaDB with mysql
- mysql makes it possible to interact with a database management system in SQL
- -u indicates the user that will be used to sign in, here root
- -p indicates the password used to sign in, to be entered after the command
- the password for the root account is empty by default when using sudo
11. Connect to MariaDB with mysql
Step 4: Configuring Nginx
Create a server block configuration file
- nano makes it possible to edit files; the ^Key shortcuts stand for CTRL + Key
- /etc/nginx/sites-available is the location of the website configurations
Example of an Nginx configuration:
Adapt the following values according to your configuration and your domain.
- server_name votre_ip_ou_domaine.example;
- root /var/www/nextcloud;
Enable the configuration
Step 5: Finalizing the installation
12. Finish the configuration from your web browser

Adapt votre_ip_ou_domaine.exemple to your configuration. The address must be the same as the one given as server_name in /etc/nginx/sites-available
You can see the template below, where the User name and Password fields are to be replaced with reliable and robust values.
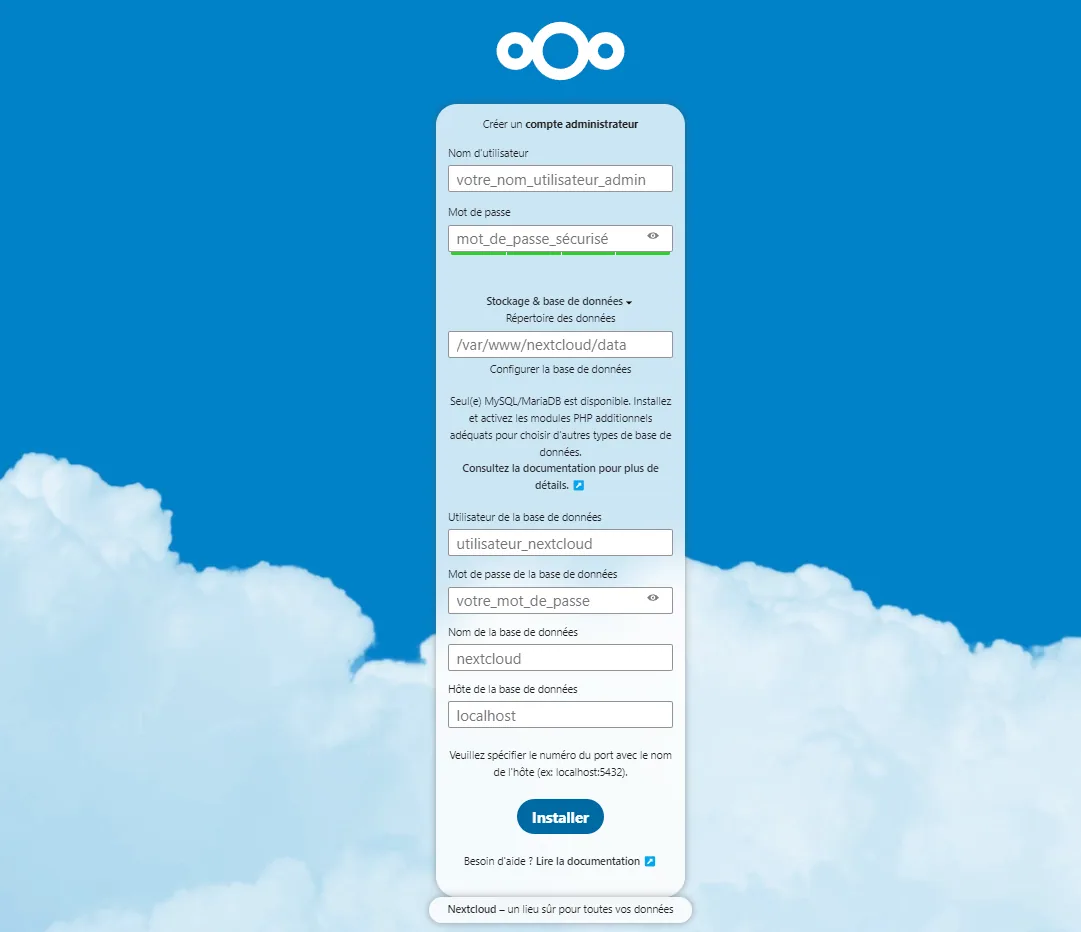
The database configuration depends on the information you entered in step 4.
The recommended applications Calendar, Mail, Talk, Nextcloud Office and others can be installed according to your preferences and are not mandatory. If you want a good overview of what you will be able to do with Nextcloud, you can install them right away.
Otherwise, it will always be possible to find them on the App Store https://apps.nextcloud.com/.
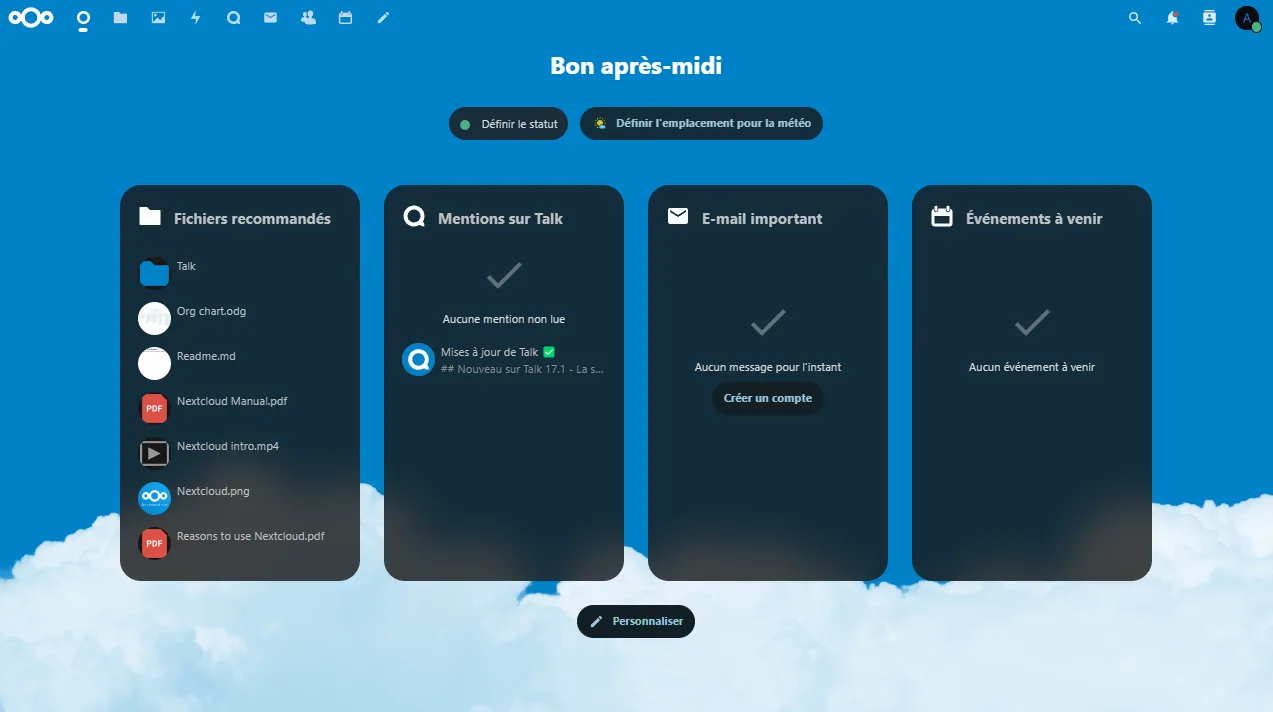
More to follow very soon, covering optimization, security and customization.