Discover the solution we offer for sharing your files through the use of your own Cloud, simply and effectively.
I - Share with public links
Through this Cloud, you will be able to share your files in different ways. So we are first going to see how to carry out this sharing through public links.
You will therefore be able to generate a sharing link that will give access to your files to anyone holding that link.
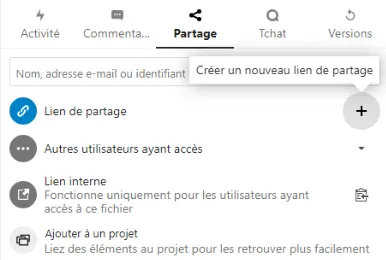
Next, several settings will be offered to you, so that you can manage what can be done with the file you have shared (note that by default, the public link is set directly to read only) :
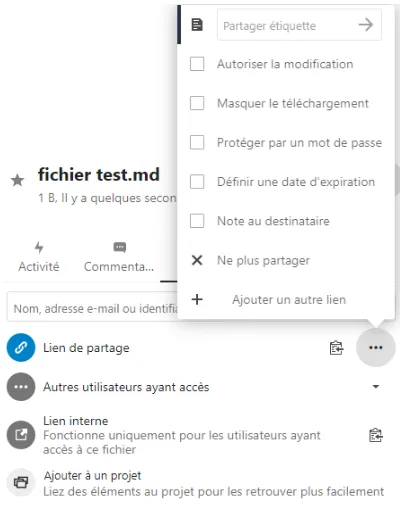
- Allow editing: which allows the people holding the link to modify the shared file at any time
- Hide download: prevents the downloading of the downloaded files
- Password protect: will only give access to your files to the people who have the link AND the password
- Set an expiration date: will allow you to share a file only during a certain period of time that you have defined in advance
- Note to recipient: allows you to leave a short message for the recipient of the share about the shared file
II - Internal sharing between users and groups
In addition to public sharing, you will also be able to share the files (or folders) of your Cloud with other users (groups, circles or members of a conversation)
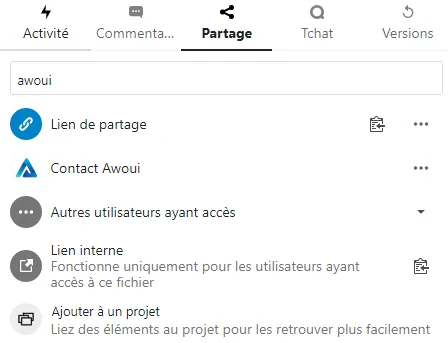
The access rights can then be adjusted according to the person with whom you have shared the file.
- You will also be able to choose whether you want to automatically accept all incoming shares (if someone wants to add a file to a folder, for example) or whether you prefer to receive a notification and accept before that person can make the addition:
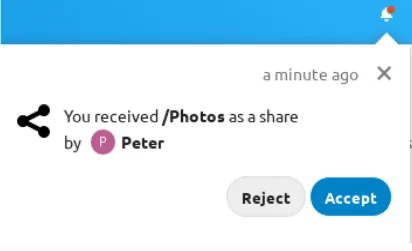
To do this, go to Settings > Sharing
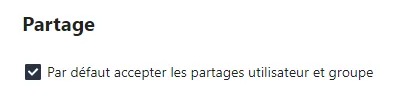
(By default this box will already be checked)
III - The “Other people with access” section
This section will let you know who has access to the file/folder you have shared (users, groups, chats, etc.)
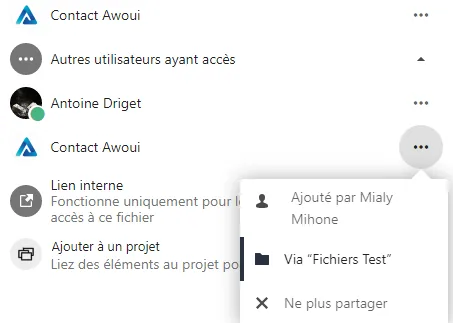
From there, you will be able to see:
- Who initiated the share
- Where this share was initiated
But also cancel the initial share, something that only the owner of the share can do.
Note:
This information is only visible to the owners of the files/folders or to the members who have been granted re-sharing rights
IV - Federated shares
This option will allow you to share files from remote Cloud servers, which will thus create your own Cloud network. Moreover, you will also be able to create direct sharing links to other users, on other Nextcloud servers.
So how do you create a new federated share?
By default, this option is already enabled on new Nextcloud installations and on those that have been updated. But for those where this is not the case, here are the steps to follow:
- First of all, go to your ‘files’ page, then click the ‘share’ icon on the file/folder you want to share.
- Then enter the user name in the menu and the URL of the remote user in the form <username>@<nc-serveur-url>
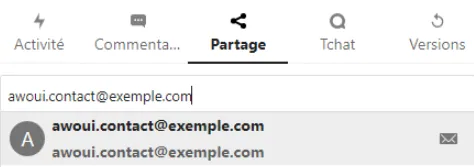
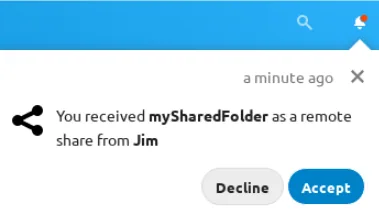
The authorized person will then receive a notification in their own Cloud, which will allow them to accept or decline the incoming share you have made.
V - Public sharing to your Cloud
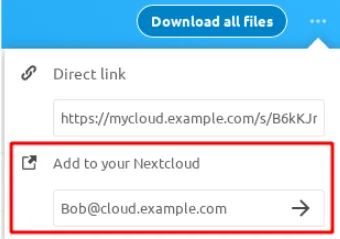
This option will give you the possibility of creating Nextcloud public link sharing pages. Thus offering you the possibility of adding files/folders as a federated share in your own Cloud.
You simply have to enter your URL of the remote user in the form <username>@<nc-serveur-url> for outgoing shares