
Changing your computer's default DNS settings can improve your privacy, your security and your browsing speed online.
To change your DNS server on a Windows 10 computer:
- Open the Windows Start menu: you can do this by clicking the button with the Windows logo in the bottom left corner of your screen.
- Then click Settings.

3. Next, select Network & Internet
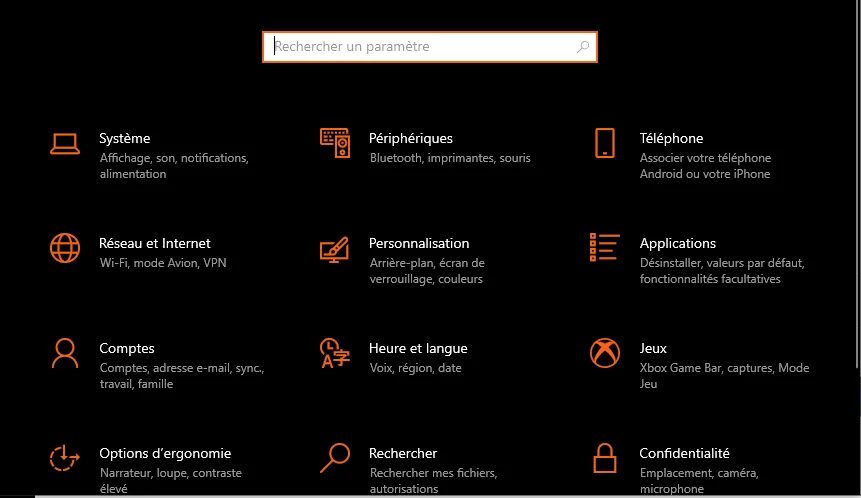
4. Then click Change adapter options

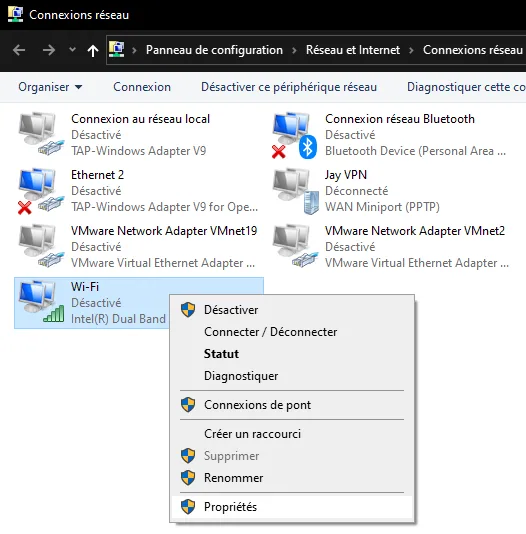
5. Then right-click the connection whose DNS server you want to change ( if you are connected by cable, select Ethernet, if you are connected by Wi-Fi, select Wi-Fi ). Then select Properties.
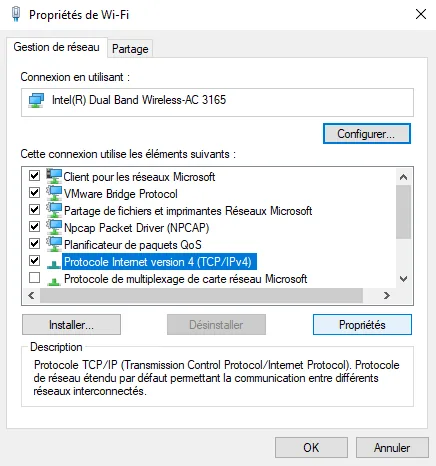
6. Next, select Internet Protocol Version 4 (TCP/IPv4) then Properties
7. Check Use the following DNS server addresses.
Then enter a new DNS address in Preferred DNS server.
I suggest 1.1.1.1, which is a free DNS service from Cloudflare, and which works as a recursive name server providing domain name resolution for any host on the internet.
For the Alternate DNS server : you can choose to enter your own DNS server if you have one ( for example Windows Server or bind9 ) or to enter another public DNS in case the primary one fails.
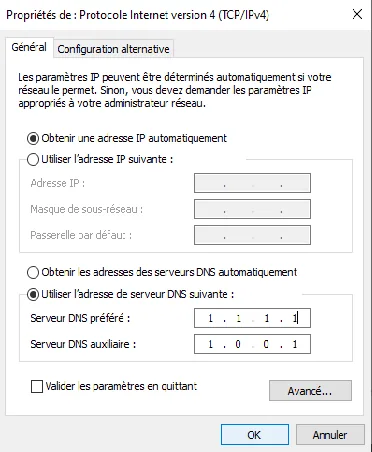
8. Finally, click OK then Close.