
Once the domain is deployed, we are left with a directory containing objects generated by default. We can then use the Active Directory Users and Computers tool (available from Server Manager), a wizard that is widely used in businesses. It allows the management of objects in the various domains, along with their users, computers and groups. To organize the objects, we will use OUs, Organizational Units (in French: UO Unité d'Organisation).
An Organizational Unit is a container created by default that is used to store what the system needs.
Step 1: The Active Directory Users and Computers console
1. Open the "Active Directory Users and Computers" console
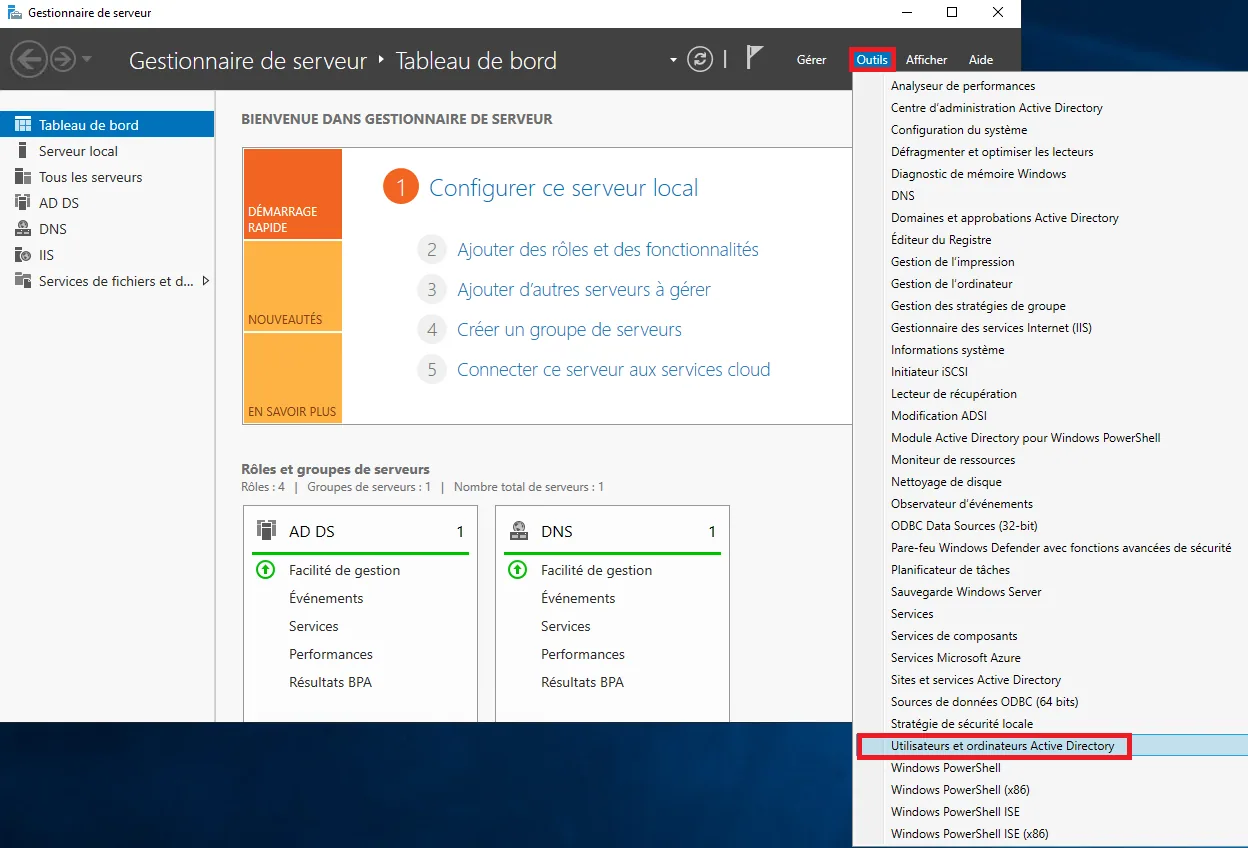
From Server Manager, click "Tools", then "Active Directory Users and Computers".
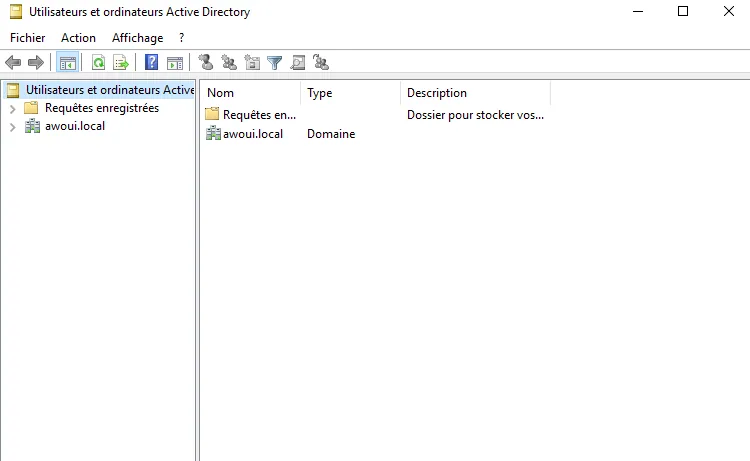
You will then arrive at this window:
2. The "Users" OU
This "Users" OU shows the user and group objects created by default when the domain controller was deployed.
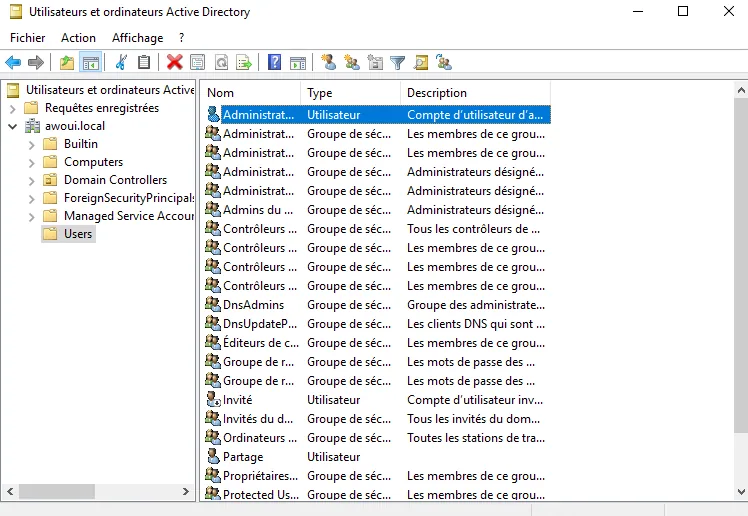
Two types of icons can be found there:
- A single profile: indicates the "User" type
- Two profiles: indicates the "Group" type
By default, the account you use after creating the domain is the "administrator" account. A "guest" account is also created, but it is disabled.
"Disabled user": indicates that the user does exist in Active Directory but cannot be used.
The company's users and groups are generally not added to this OU, which is reserved for objects used by the system.
Step 2: Declaring AD resources
Resources are declared in a different Organizational Unit. A new one therefore has to be created.
Objects (computers, users, and so on) must be organized, and this is done with organizational units. There are several methods for this, which vary from one company to another, each having its own. We will take here the example of a case where we choose to sort by geographic area, in this case the city of Paris.
The AGDLP method recommended by Microsoft can help you define a sound naming structure.
1. Create an Organizational Unit
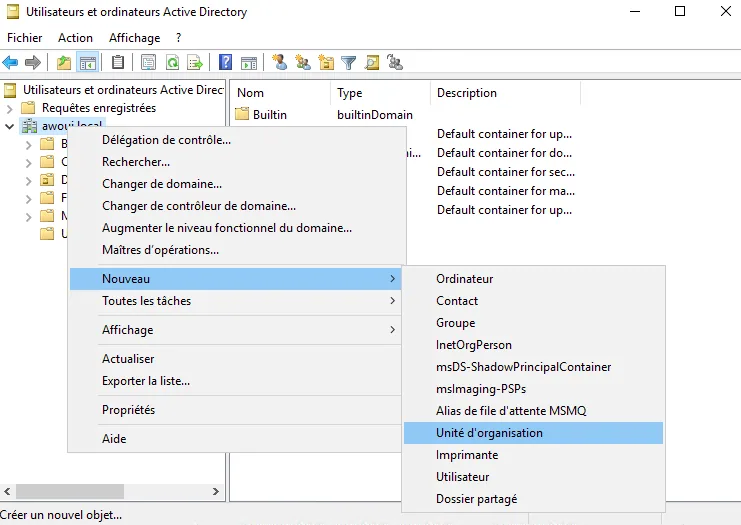
Right-click the domain name (here awoui.local), click "New", then "Organizational Unit".
Name the OU and click "OK"
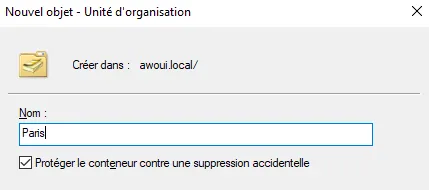
(You will notice that there is a setting you can select or clear that protects against accidental deletion, which will make deleting an OU more involved than a simple deletion)
For the purposes of this illustration, we are going to create 3 more OUs under the Paris OU:
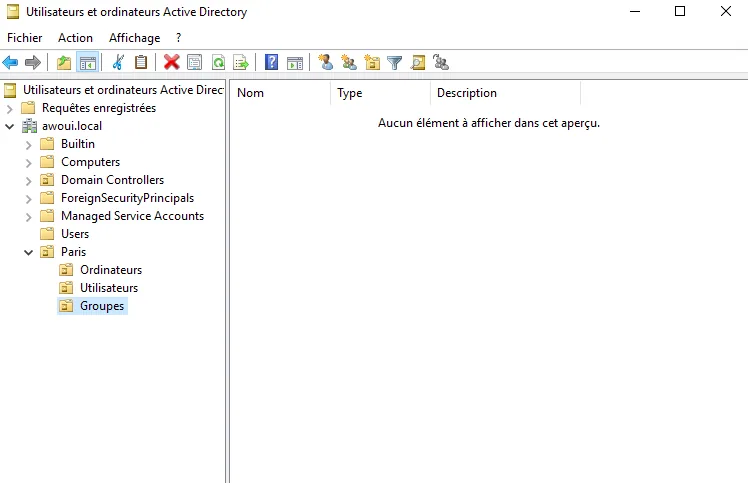
2. Create a user
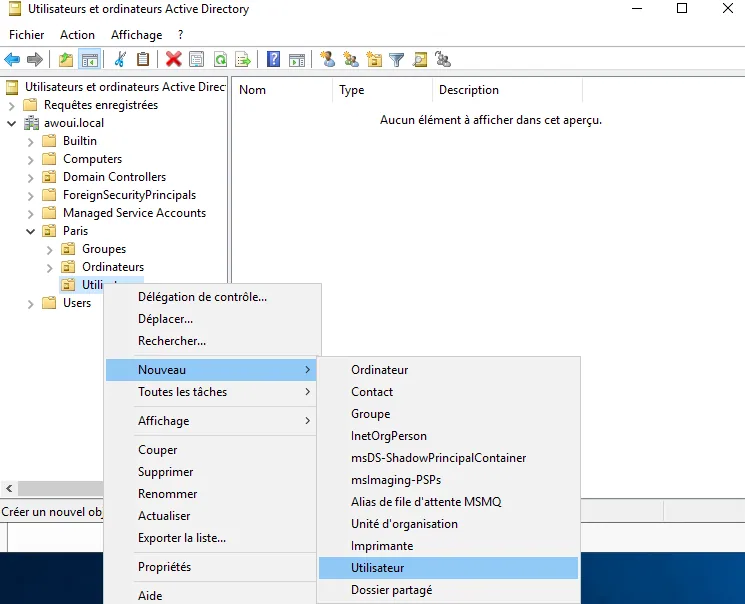
Right-click the Users OU, then "New" and finally "User"
You will then be faced with the window for managing the user's name:
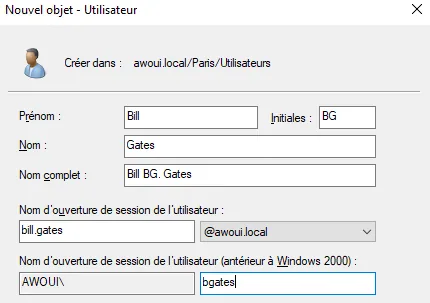
Fill it in following the model above and the explanations below, then click "Next".
The logon name
This is the identifier the user will be able to sign in with. Generally, the convention is that the identifier is written in the form: prenom.nom@votredomaine
It can also be written in the form (as seen above): VOTREDOMAINE\pnom
Password management
A window like the one below will then appear. It allows you to manage the password of the user you are creating.
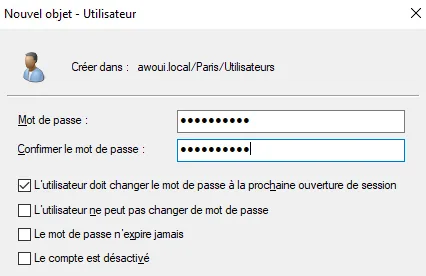
You will then face 3 options that are more or less compatible with each other. Care must therefore be taken in the way they are combined:
- "User must change password at next logon"
At their first sign-in, the new user will be given a password that was randomly generated beforehand. However, they will not be able to perform any action until they have changed it.
- "User cannot change password"
This case generally concerns only users tied to an action or a service. For example, a connected digital display, or an account dedicated to printing.
- "Password never expires"
The option must be used with care, in cases where a user's password should not be changed. This option cannot be combined with the first option.
- "Account is disabled" This option concerns accounts that will be used later, or cases where an employee leaves the company for example (a policy of disabling the account then follows). Indeed, in some cases, when a person leaves a company, access to their former account is sometimes requested again, because that person may have been the only one with access to certain data, for example. This is why, when someone leaves, their account will most often not be deleted but only disabled for a certain time. This can also help in scenarios where the person who left the company comes back shortly afterwards.
And that is it: the user has been created and their password has been set:
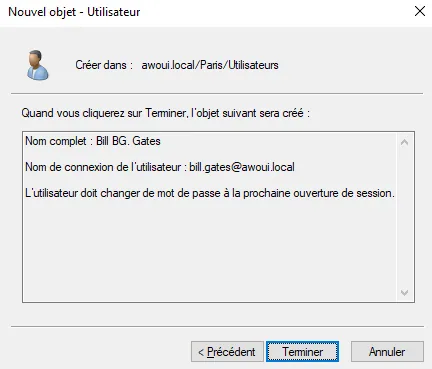
Click "Finish"
3. Create a group
Right-click, then click "New" and finally "Group"
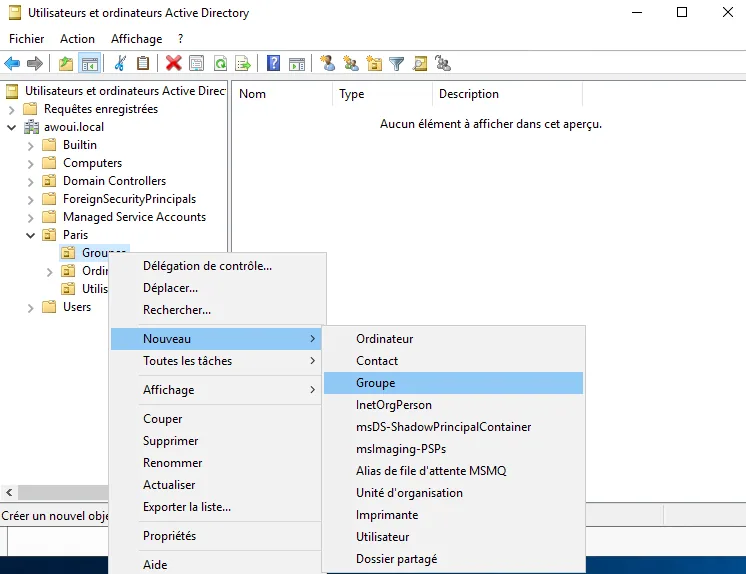
Name the group as follows:
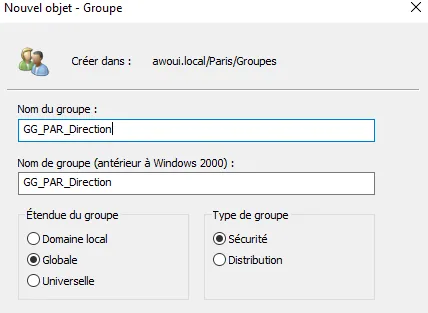
Here:
GG: for Global Group
PAR: for Paris
Direction: for the department/role
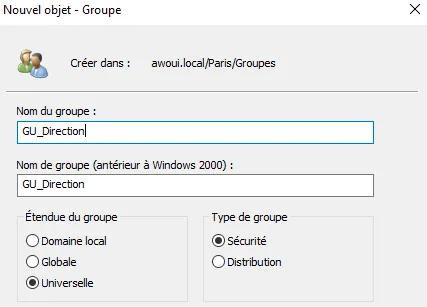
Here:
GU: for Universal Group
Direction: for the department/role
The scope level:
Domain local: This is the scope that gathers all the users of global, universal and domain local groups from every domain in the forest of its own domain. It can therefore only be used within the domain.
Global: This is the scope that can contain the users and global groups of the local domain, but that can also use those of the domains trusted by the root domain. More concretely: imagine that a "domain 1" creates a trust relationship with a "domain 2"; a global group created in "domain 1" will then be usable in "domain 2"
Universal: This is the scope that gathers all the users and the global and universal groups of any domain across the whole forest.