
There are many resources about SNMP (see SNP Network Management and Monitoring), so I will not go into detail here, but in fact it is used for network monitoring and management. SNMP is made up of 3 parts; the SNMP manager, the SNMP agent and the MIB.
In Packet Tracer the use of SNMP is very limited, but it is possible to configure a router or a switch as an SNMP agent and to use a PC or a laptop as a MIB browser. So, although you cannot set SNMP traps or informs, it remains a useful learning tool to show the kind of information that can be retrieved, and even a few items that can be set on an SNMP agent. In this example, we have a fairly basic setup to demonstrate SNMP. There is no need for anything too complex here, although SNMP can work without any problem on much larger Packet Tracer networks.
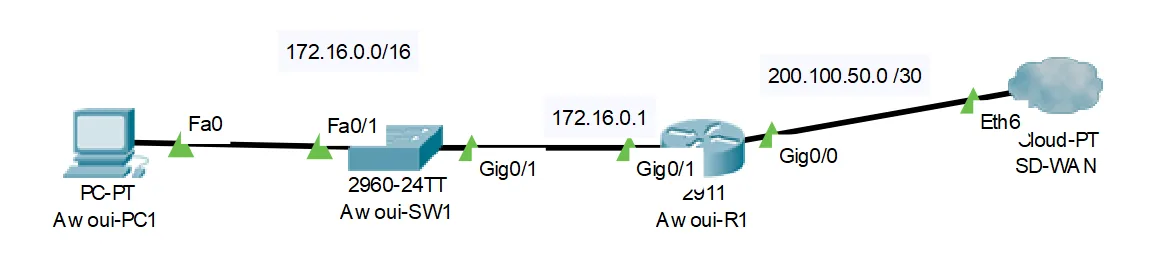
We are going to configure SNMP; as mentioned earlier, there are not many options here, so the configuration is relatively easy. Below is the configuration of Awoui-R1; for our simulation the other devices will use exactly the same syntax.
Awoui-R1(config)#snmp-server community testro ro
Awoui-R1(config)#snmp-server community testrw rw
These two lines start the SNMP service and apply "passwords". The ro and rw at the end of each line refer respectively to Read Only (ro) and Read Write (rw). That is all, we cannot do anything else on the router or the switches. It is worth mentioning here that the switches will need to have an IP address and a default gateway assigned so that we can reach them. An example of the syntax to do this is below:
Awoui-SW1(config)#int vlan 1
Awoui-SW1(config-if)#ip address 172.16.0.100 255.255.255.0
Awoui-SW1(config-if)#no shutdown
Awoui-SW1(config-if)#ex !
Awoui-SW1(config)#ip default-gateway 172.16.0.1
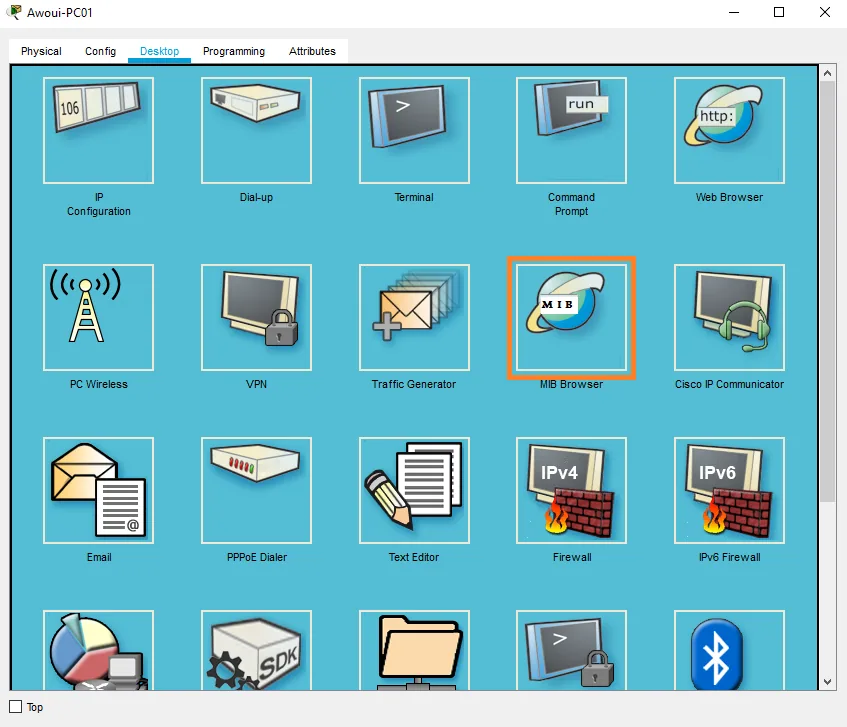
Now that we have done all the configuration, we can start the MIB browser and see what we can actually do. On a PC, click the Desktop tab and select the MIB browser:
We first have to select a target (or an SNMP agent); click the Advanced... button and enter the IP address of a device you want to connect to; in this case, I will choose Awoui-R1:
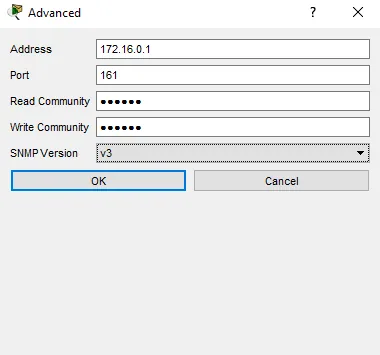
Leave the port number at 161 and enter the two "passwords" that we used on all the routers and switches; in our case, both testro and testrw, then select the SNMP version, we will use v3.
We are ready to connect to the device; in the left-hand pane, expand the MIB tree as shown below.
Once in the tree, we can start to see some of the available options. For example, click .sysName and, in the Operations drop-down list, select Get and press the GO button; you should see the display below:
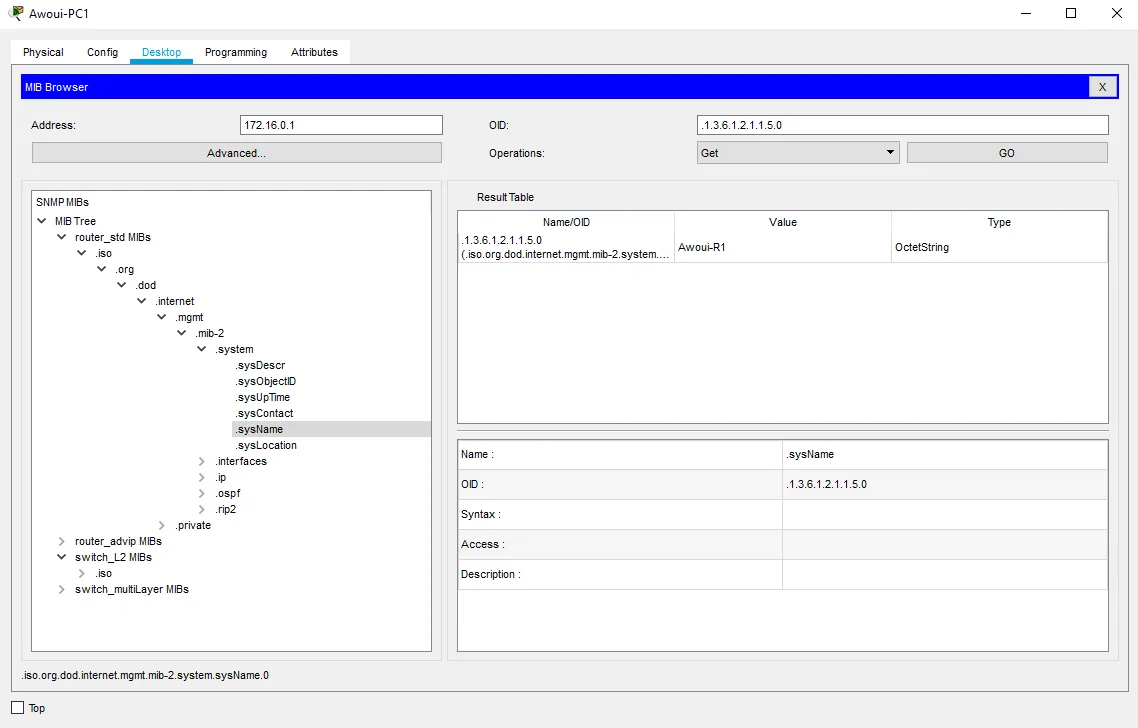
Experiment with the different fields available to you and keep clicking the Get button. Feel free to move into the other areas (such as .interfaces for example) and you will get a small idea of the amount of information available on the device. Also try to connect to the switches; remember that you will have to go back to Advanced... and select the new target.
In addition to viewing information, we can also set certain fields; not all fields are writable, so this will not work with everything. Using the .sysName field that we looked at earlier, we are going to change the value for it. To do so, change the Operations drop-down list, choose Set, and a dialog box will appear.
Leave the OID line as it is but change the data type to OctetString. This data type must be the same data type as displayed in the results table when you ran the Get function earlier. Then enter a value in the Value field as shown below:
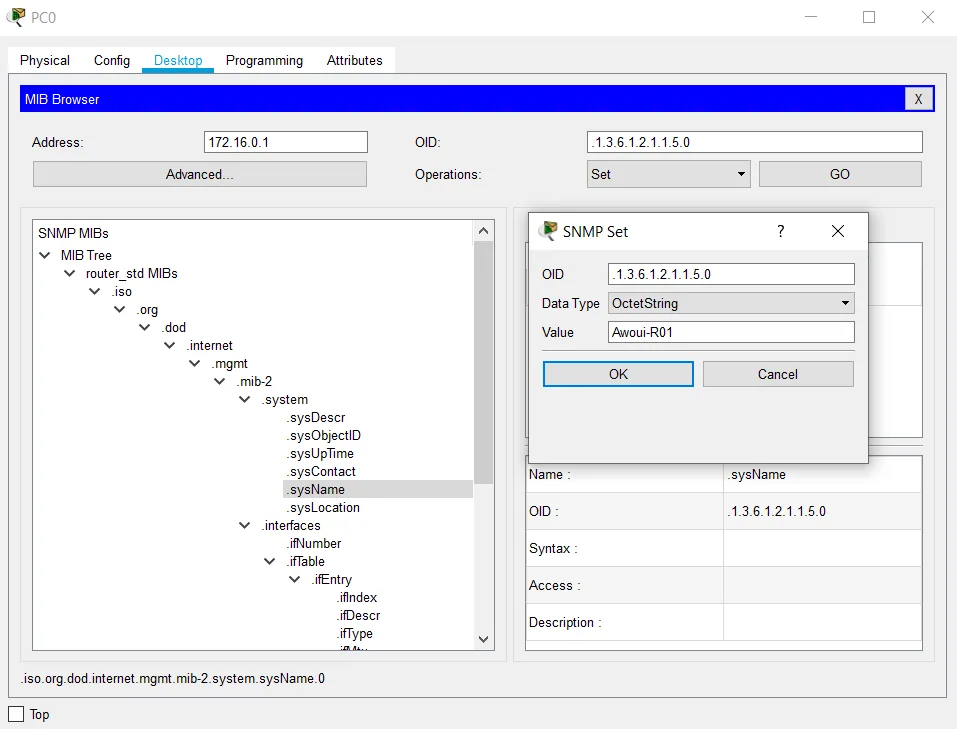
Press the OK button and the value will be sent to the device. You can check this by going back to the Get function and seeing the new value. In this case as well, it will change the name of the router, so you should see that in the running configuration for the router:
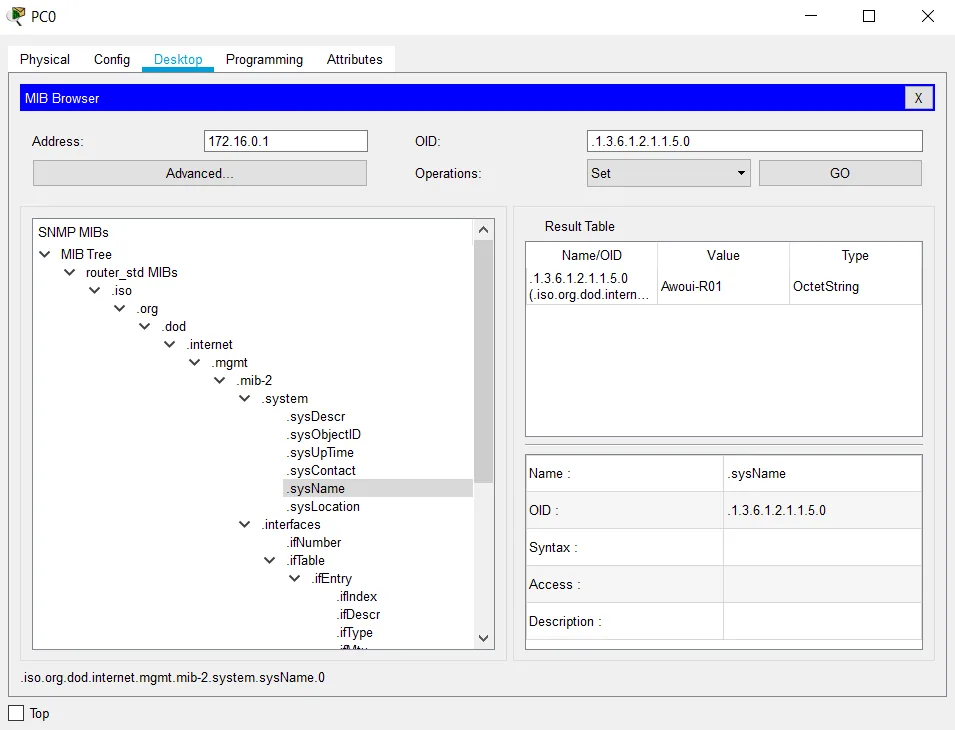
That is more or less everything you can do with SNMP in Packet Tracer, but it should give an idea of the capabilities of SNMP, in particular on a large network.