
RAID (Redundant Array of Independent Disks) is a storage technology that makes it possible to combine several hard drives in order to improve performance and/or data redundancy.
On Windows, there are several RAID levels, each offering advantages and drawbacks in terms of performance, reliability and cost. Here are the main RAID levels:
- RAID 0: combines two or more disks to increase read/write performance, but without providing data redundancy. If one of the disks fails, all the data is lost.
- RAID 1: uses two disks to create an exact copy of all the data on each disk. If one of the disks fails, the other disk can be used to recover all the data.
- RAID 5: combines three or more disks to provide data redundancy. The data is spread across all the disks, with a parity calculated to allow data recovery if a disk fails.
- RAID 10: combines two (or more) sets of RAID 1 disks to provide both high performance and data redundancy. The data is spread across the two sets of disks, and each set provides mirrored data redundancy.
RAID can be configured on Windows using the disk management utility or using third-party software. It is important to note that RAID is not a backup solution, and that regular backups must be carried out to protect the data against loss in the event of a hardware failure or a natural disaster.
Configuration Via VMWare Workstation
Adding two extra SCSI disks at the size you want.
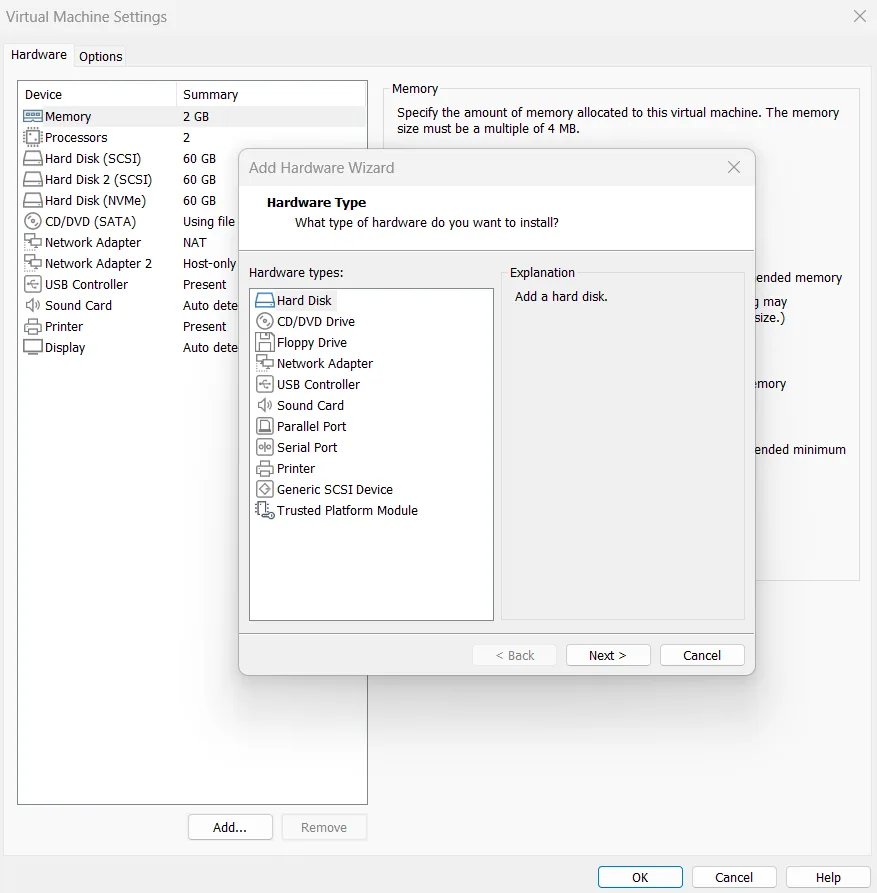
Choosing the SCSI type
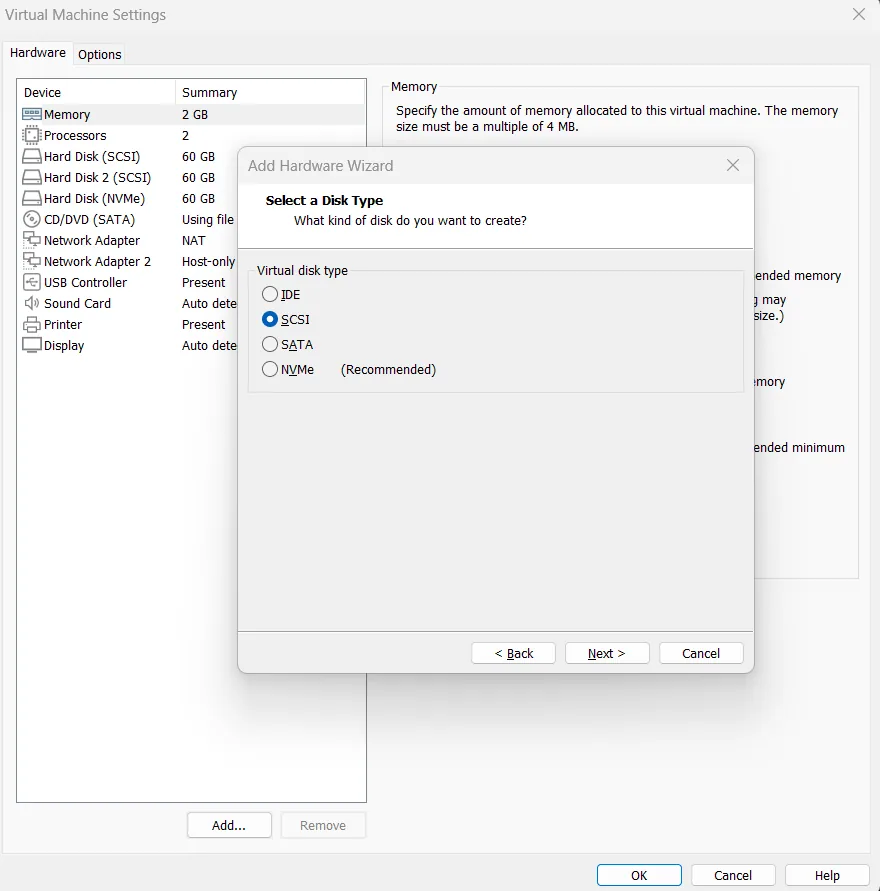
Create a new virtual disk
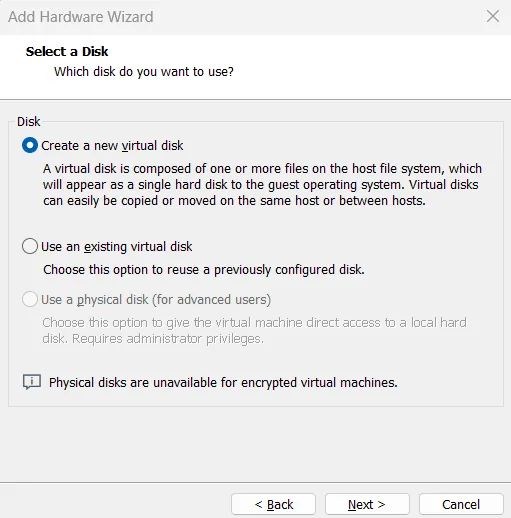
Select the size and the storage type.
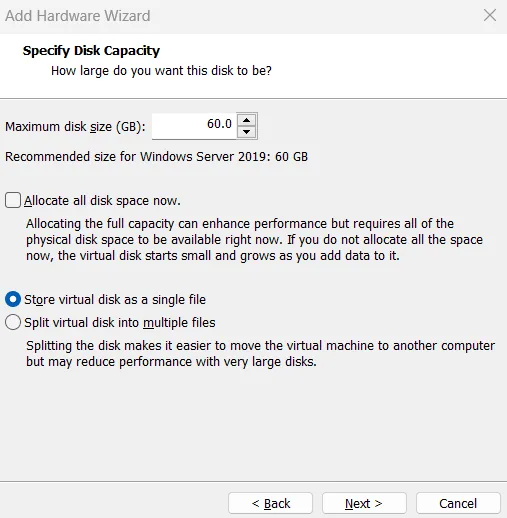
Leave the disk size at its default value.
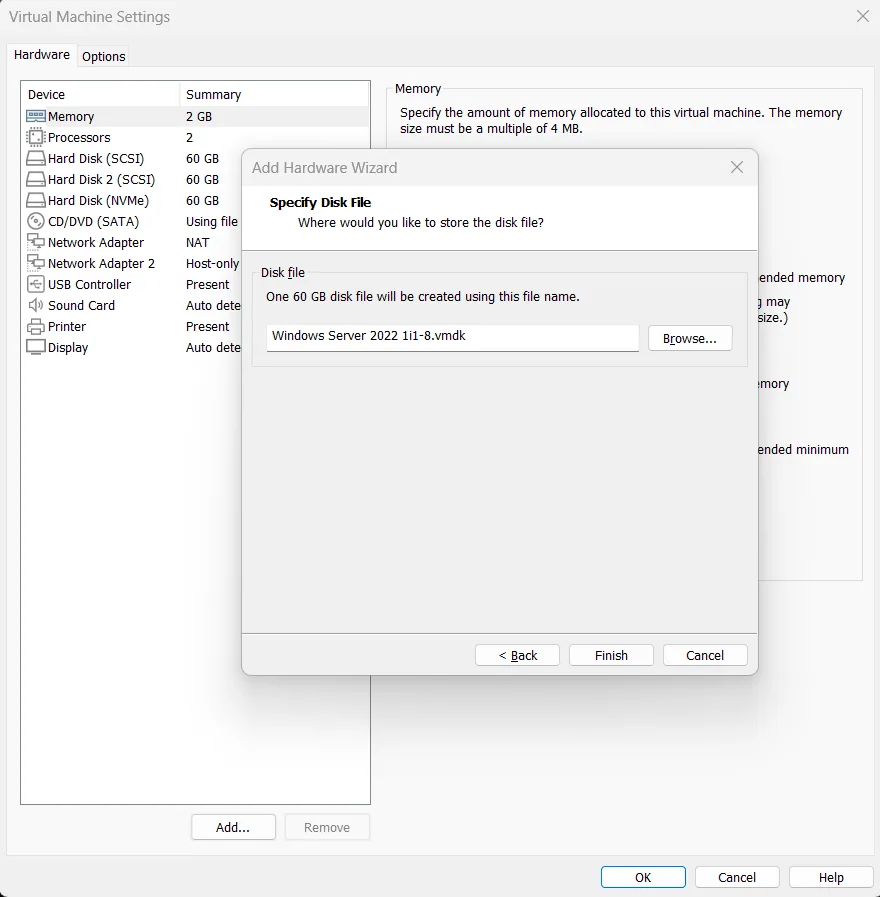
Repeat the operation once for the second disk.
Start the virtual machine.
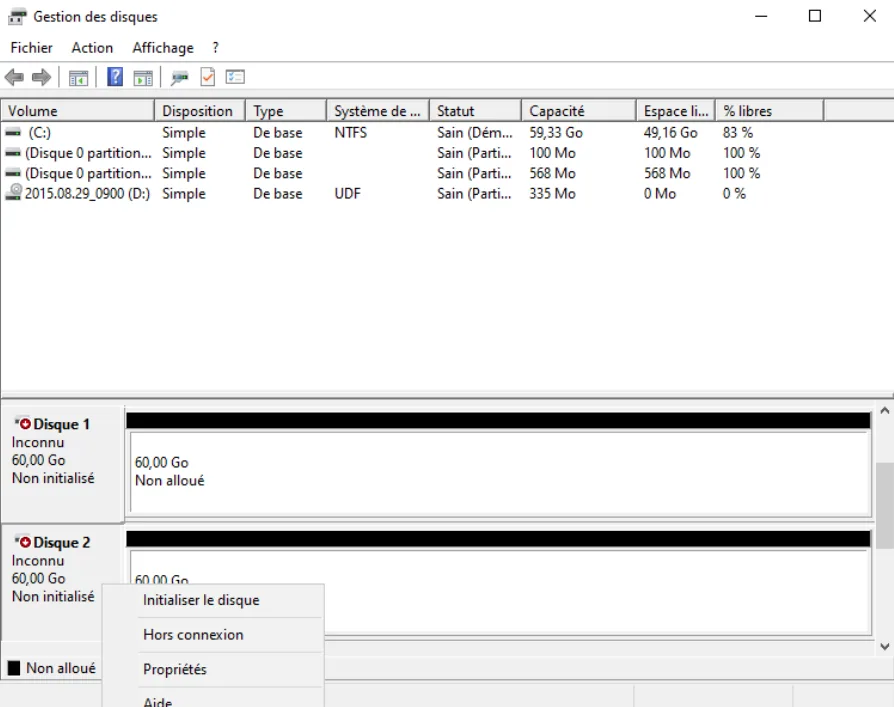
Access Disk Management through the Start menu.
Find the two disks. Then right-click on the disk names to bring them online and Initialize them.
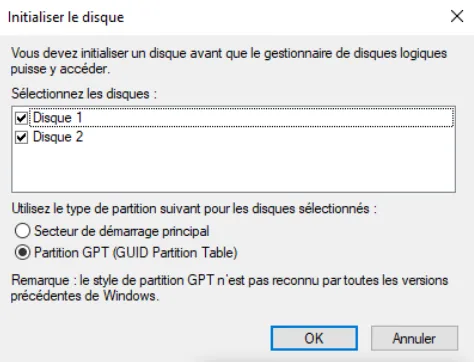
Select the two disks with the GPT partition style, then confirm.
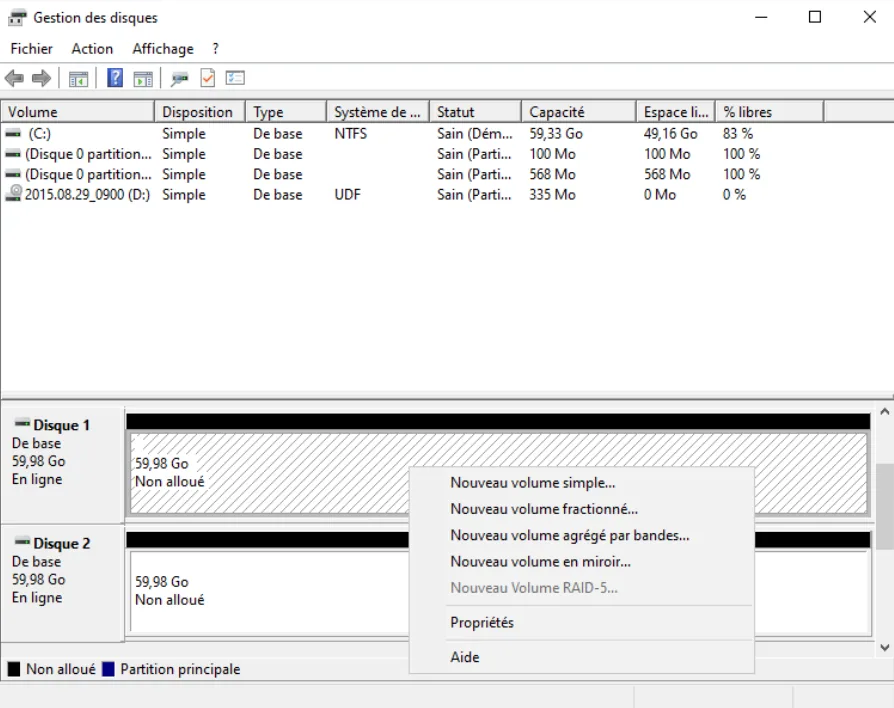
Right-click on one of the two disks, then choose Mirrored Volume...
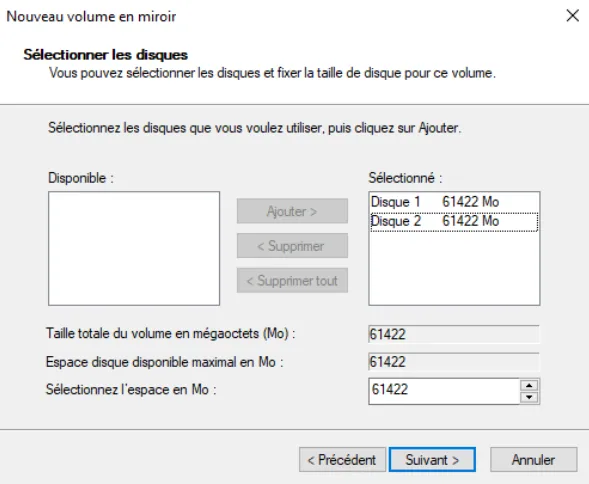
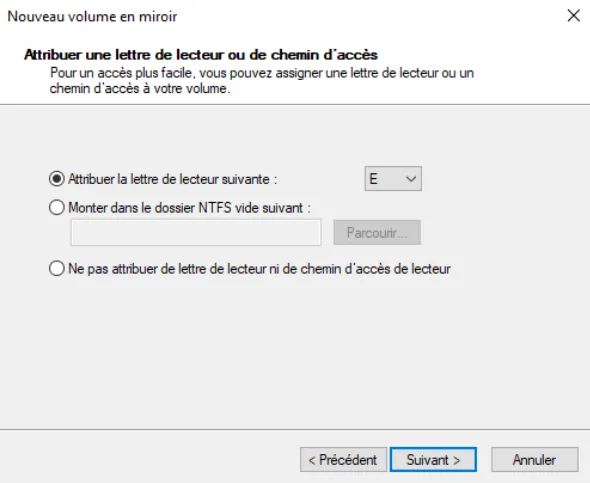
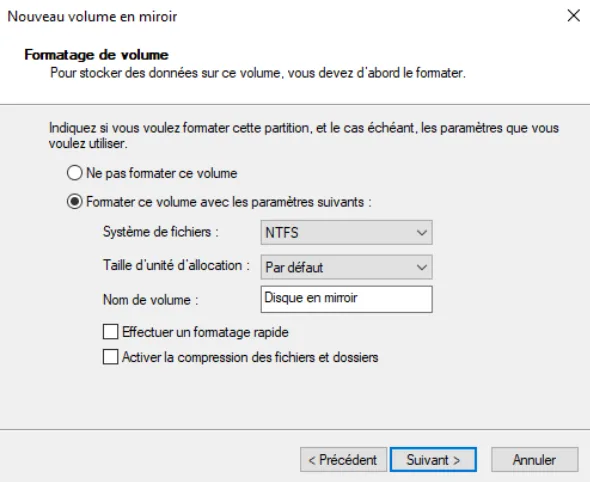

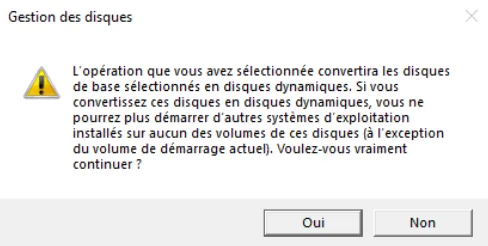
Click Yes to convert the disks to dynamic.
You will then be able to see your volume appear in the file explorer.