
A VPN is one of the most popular tools for allowing users to work remotely. Although there are many third-party VPNs available, you can configure Windows Server to act as a VPN. In this article, I will show you how to configure Windows Server 2019 to act as a VPN server.
Before I begin
Before I begin, there are two things I need to mention quickly. First, the procedure I am about to show you is not the only way to set up a Windows Server VPN. I intend to make the process as simple as possible for the benefit of those who have never done it before.
The second thing you need to know before starting is that the VPN server will need to be equipped with two network interfaces. One of these interfaces will handle incoming traffic and must be connected to the Internet. The other interface will be connected to your internal network.

Windows Server 2019 VPN configuration process
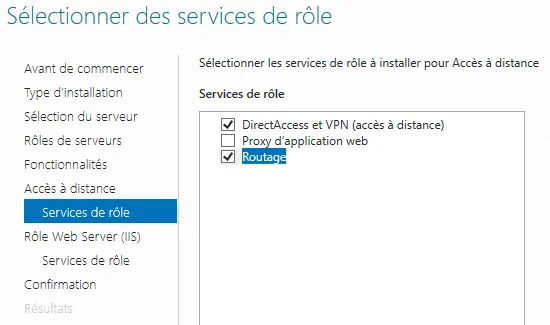
The first step in this process is to use Server Manager (or PowerShell) to install the Remote Access role , shown below. You do not need to worry about installing additional feature roles, but when you reach the Role Services screen, you will need to select the DirectAccess and VPN (RAS) service and the Routing service, along with the supporting features that are recommended by Windows.
Select the Remote Access role and then the DirectAccess, VPN, and Routing services.
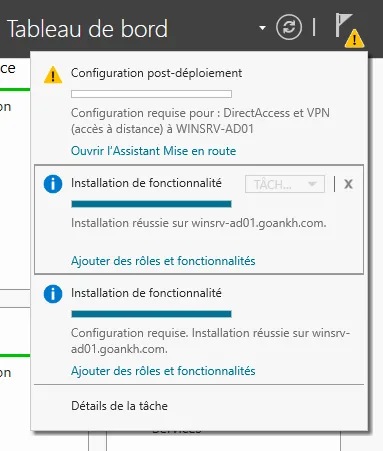
Once the process of installing the roles and features is complete, go ahead and close the wizard. Then click the Server Manager Notifications icon. When you do, you will see a message indicating that post-deployment configuration is required. Click the Open the Getting Started Wizard link.
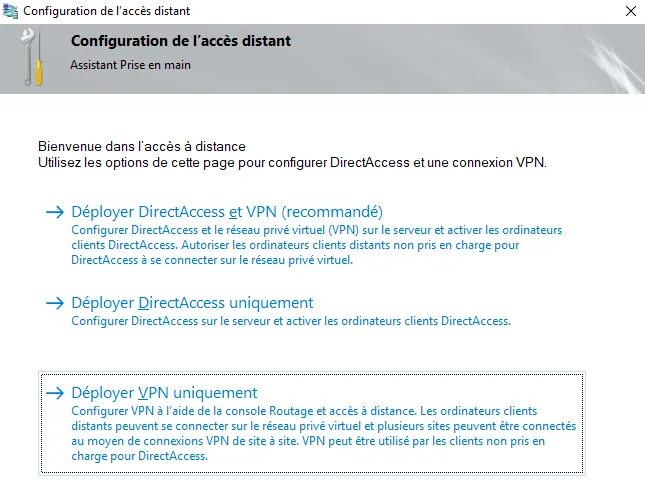
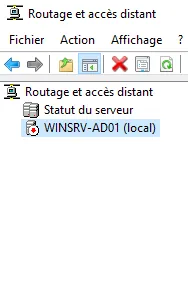
At this point, you will see a screen asking how you want to configure the server. In the interest of keeping things simple, go ahead and choose the Deploy VPN only option. When you do, Windows will open the Routing and Remote Access console. At this point, you will need to right-click your server's listing in the console tree, then choose the Configure and Enable Routing and Remote Access option from the context menu, as shown below.
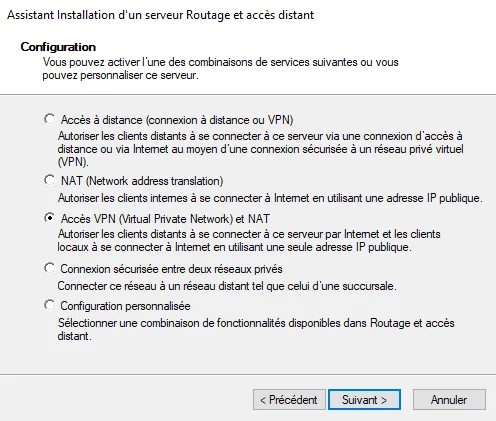
Windows will now launch the Routing and Remote Access Server Setup Wizard. Click Next to bypass the wizard's welcome screen and you will be taken to a screen asking which service you want to configure. The appropriate selection will vary depending on your use case. However, if your goal is to enable basic VPN features, you should choose the VPN access and NAT option.
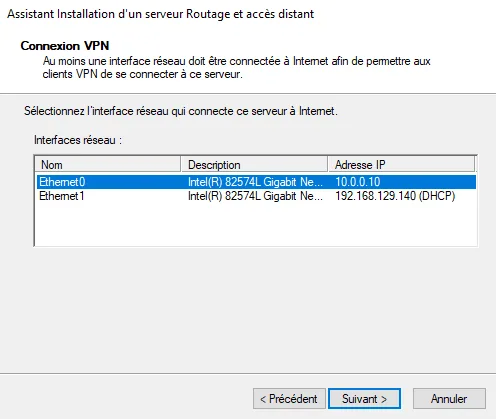
The next screen asks you to choose which interface connects to the Internet. This is the interface through which clients will connect to the VPN server.
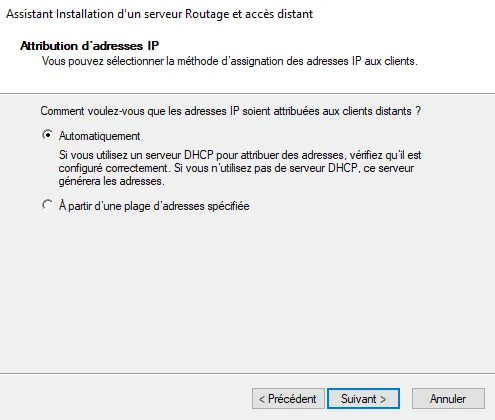
Now, choose whether you want to automatically provision clients with IP addresses (from a DHCP server or a dedicated address pool). Make your selection and click Next.
Click Next and you will be asked whether you want to use a Radius server to authenticate remote access requests. Choose No to allow the VPN server to authenticate the authentication requests itself. Click Next, then Finish. When you do, you may see a message telling you that you need to manually open the necessary firewall ports. Be sure to do so if required.
Testing your VPN
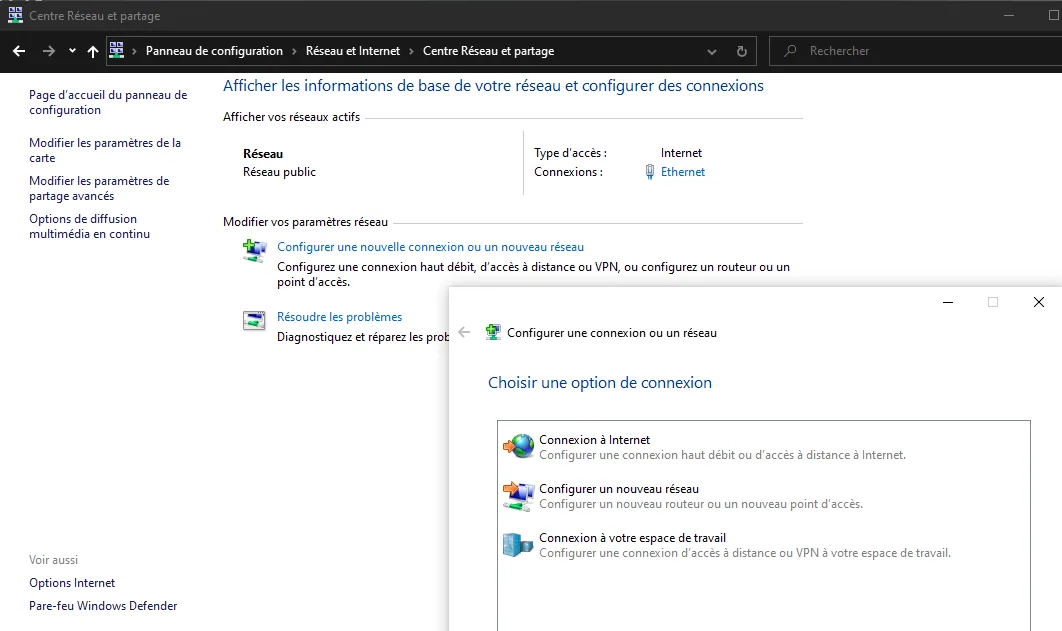
Before you can test your VPN server, you will need to grant one or more users permission to access the server remotely. Once you have done this, you should be able to connect to the VPN server from a Windows 10 client. To establish VPN connectivity, open the Windows Control Panel, then click the Network and Internet option, then Network and Sharing Center. When the Network and Sharing Center opens, click the Set up a new connection or network link. On the next screen, choose the option to connect to your workplace.
The next screen will ask whether you want to use your Internet connection or whether you prefer to connect directly to the VPN server. Choose the Internet option.
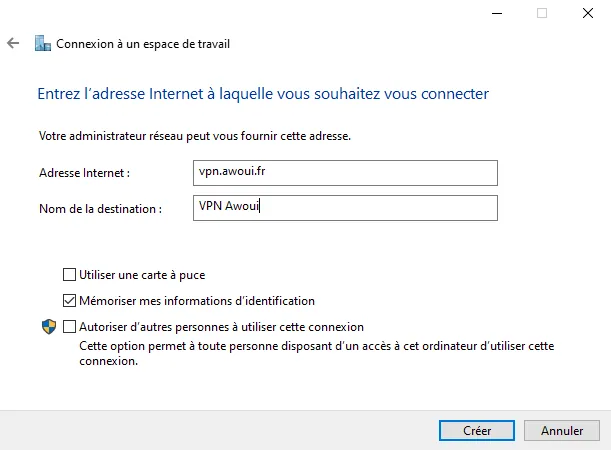
At this point, you should be taken to a screen that asks for the Internet address of your VPN server. You can fill in this field using a DNS name or an IPv4 or IPv6 address. You will also need to provide a name for the connection you are creating. Click the Create button to create the VPN connection.
Now, go back to the Network and Internet screen in the Control Panel. Click the Network and Internet link, then the Network and Sharing Center link. Click Change adapter settings and you should see an icon representing your VPN connection. Right-click this icon, then choose the Connect / Disconnect option from the context menu. When prompted, click the connection in the pop-up window, then provide your authentication credentials. The client should be able to connect to the VPN you created.