
To properly understand how the installation of a controller on Windows Server unfolds, it is important to know certain terms. Active Directory forest : When you create the first domain controller of your organization, you create the first domain (or root domain of the forest) and the first forest. The Active Directory forest is a grouping of one or more domain trees. A tree can have one or more domains and an organization can have several forests. A forest is a security and administration boundary for all the objects it contains. Active Directory domain : A domain is an administration boundary meant to make it easier to manage objects such as users, groups and computers. In addition, each domain applies its own security policies and trust relationships with the other domains. Domain controller : – A domain controller is a server that runs the AD DS role. Active Directory is a central database that stores user accounts, computer accounts, organizational units, Active Directory domains and forests. The management of users, of computers, or the application of policies, are done from the server's Active Directory (which can be launched with the dsa.msc command).
Prerequisites: For the installation of a domain controller, the prerequisites are the same as for the installation of Windows Server 2019. The minimum configuration (core):
- Processor: 1.4 GHz 64-bit
- RAM: 512MB
- 32GB of disk space
To begin the deployment it is necessary to configure your server with at least one static IP.
Step 1: Name the server according to the appropriate naming convention.
1. Click the name of the computer
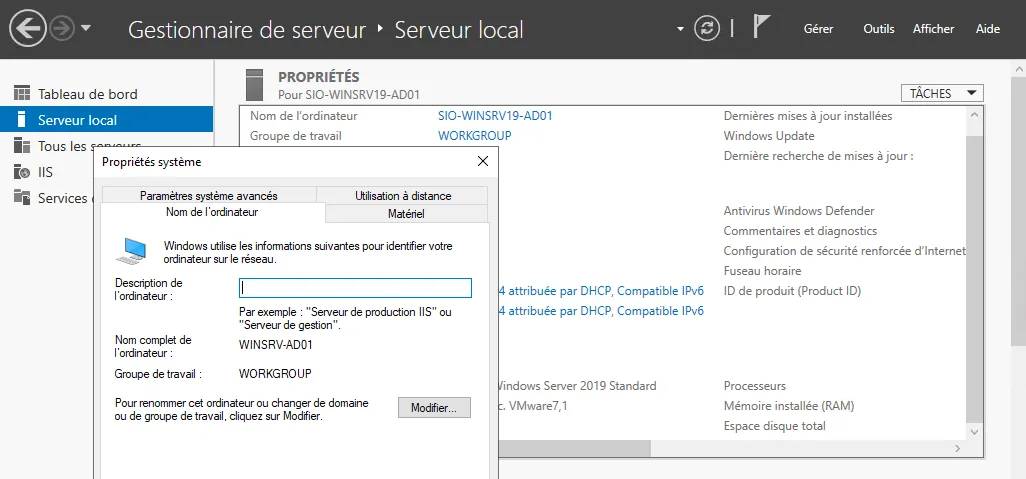
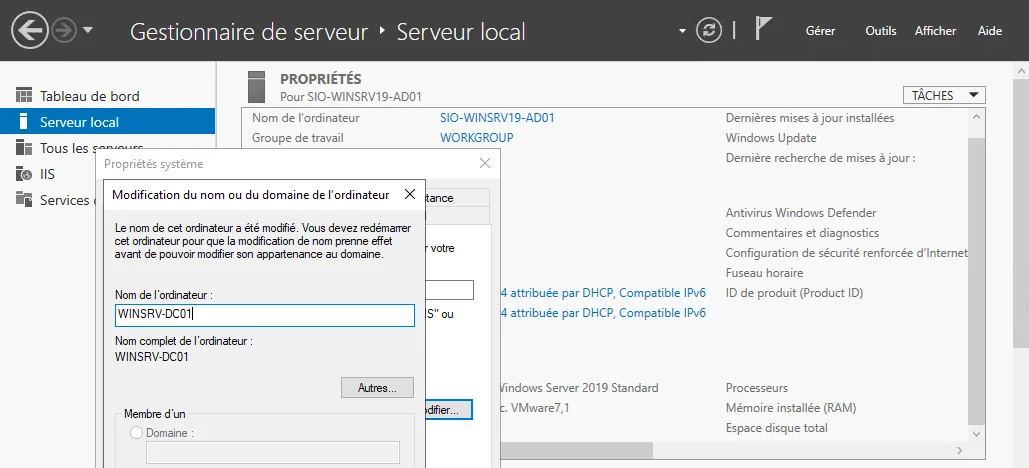
Here, we will call the server WINSRV-DC01.
2. Click modify and rename the computer, then click "OK"
Step 2: Configure the IP address manually
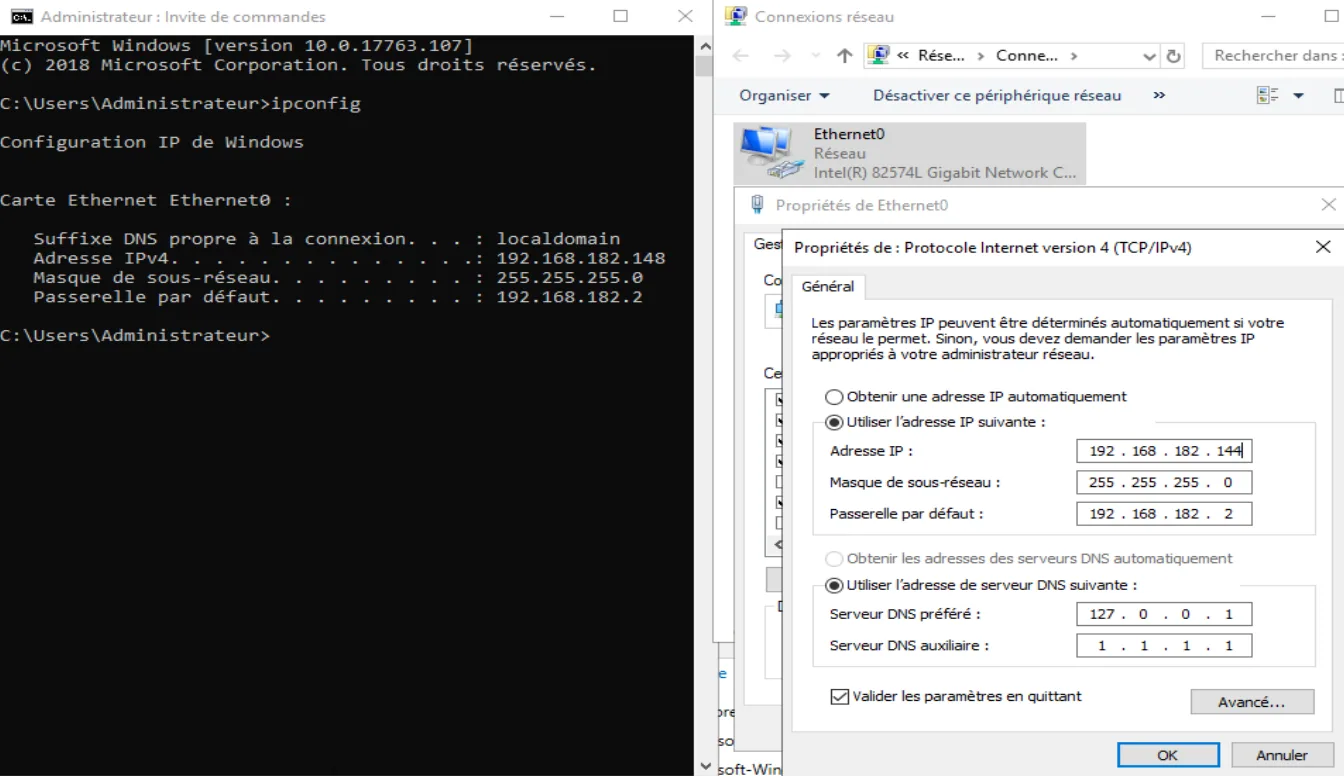
To deploy a domain controller it is mandatory to set an IP address manually on at least one network interface.
1. Access the network interface configuration
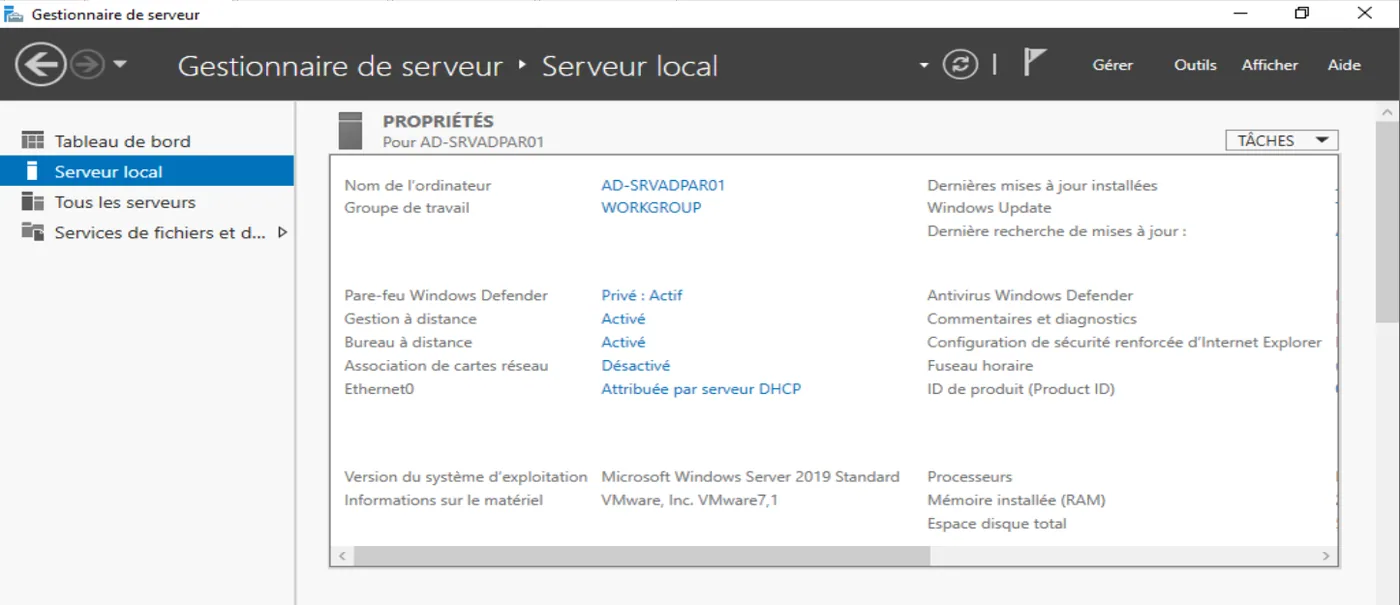
You can go directly to the Server Manager, into "Local Server", then you will find your network card in the list of settings (here Ethernet0) followed by assigned by DHCP server. Click on it to open the configuration of the card.
2. Configure the IP address manually
Step 3: Installation of the DNS & AD DS Roles
To install a domain controller, two roles are essential: the DNS and AD DS roles.
- AD DS (Active Directory Domain Services) is the role that allows the commissioning of the Active Directory domain and of its network directory.
- DNS (Domain Name System) is the role that allows the resolution of domain names into IP addresses.
1. Add roles and features
From the Server Manager, click "Manage" then "Add Roles and Features".
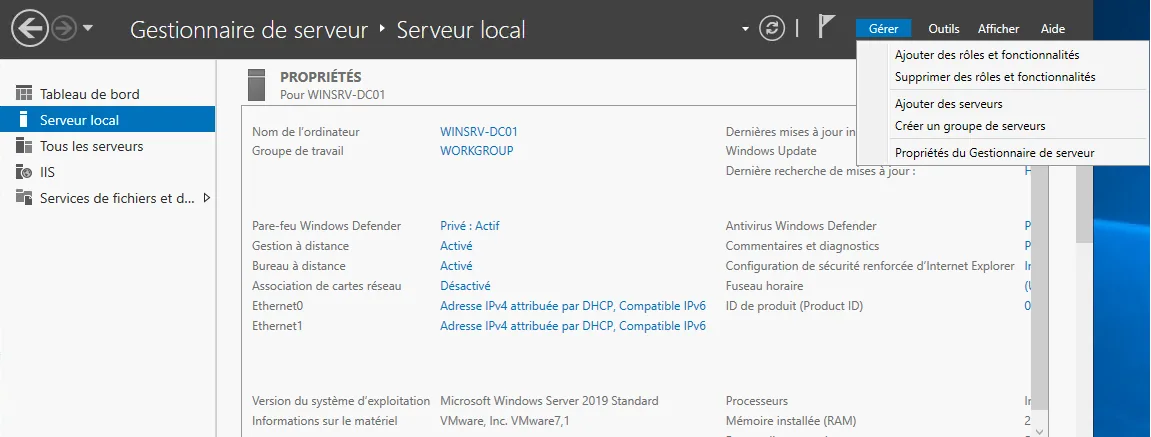
2. Installation type
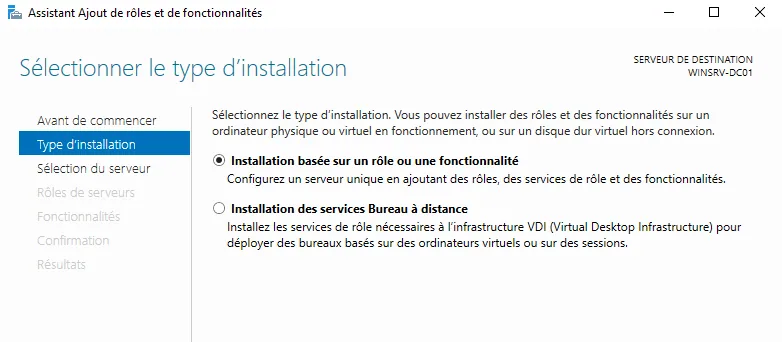
Go to "Installation Type" then choose "Role-based or feature-based installation" and click "Next"
3. Server selection
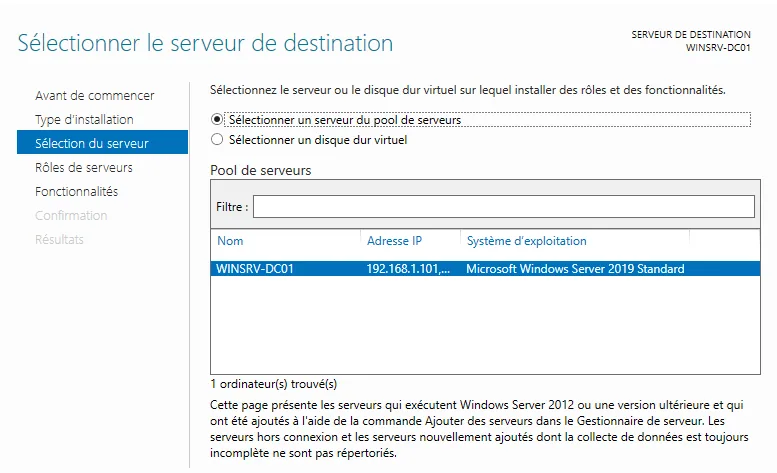
For now, there is only one server in the pool, so you just have to select it and click "Next".
4. Server roles
You are now on the server roles selection window. However, it is essential to have a DNS server for AD DS to work.
We are therefore going to install the DNS and AD DS roles. To do so, simply check:
"DNS Server" and "AD DS Services" in the roles selection window.
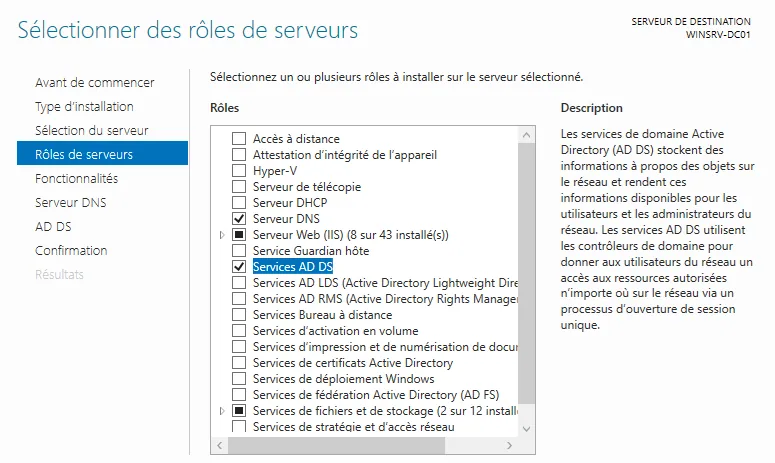
When you try to check these boxes, a feature management window.
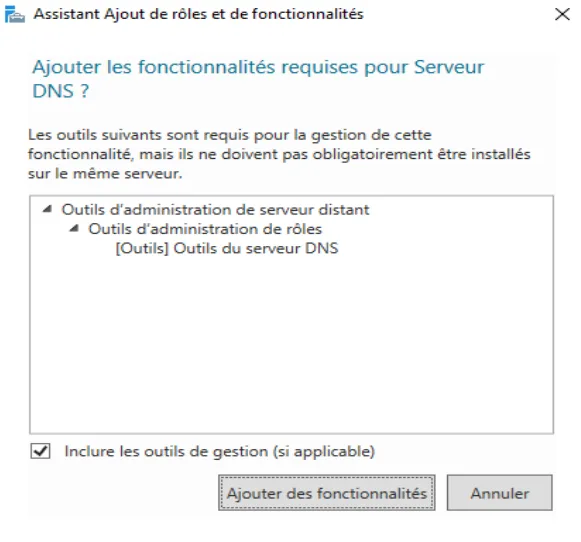
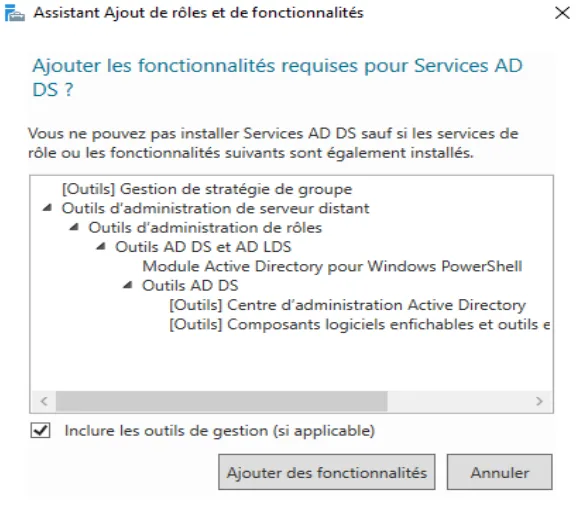
The required features are automatically selected for you, add them.
Finally, click "Next".
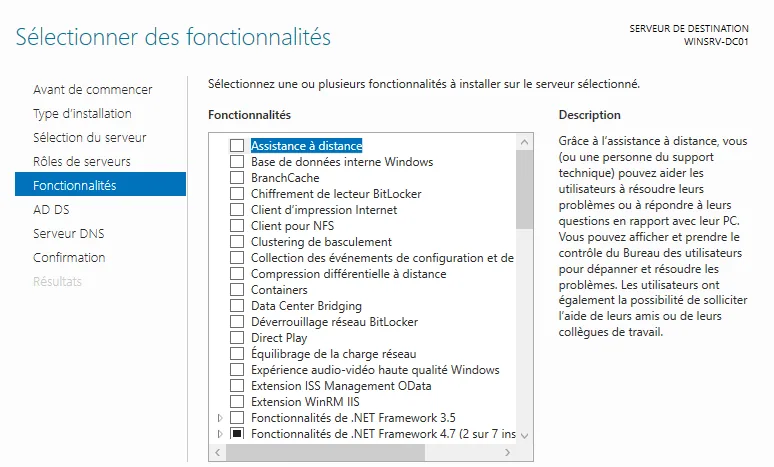
5. Features
After adding roles, you can add additional features. In general, all the features that are needed to support the targeted roles are already selected, so you can simply click the Next button to continue.
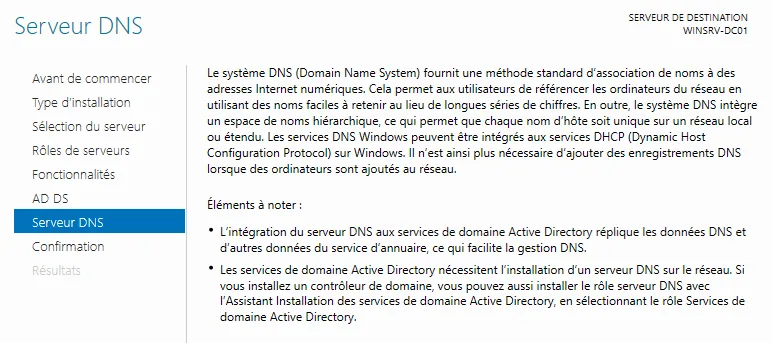
6. AD DS and DNS Server
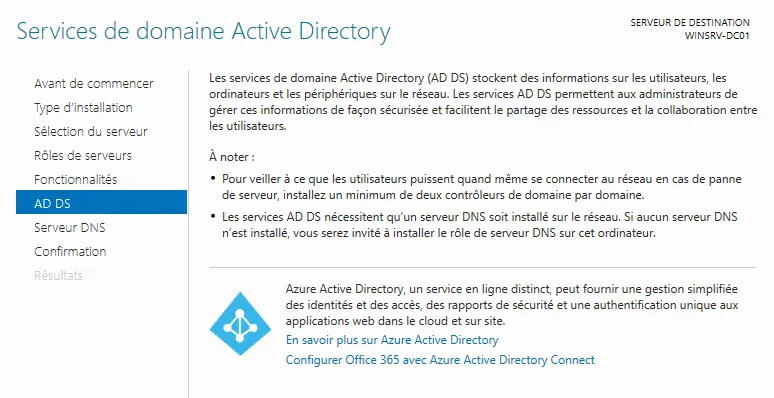
You will then find sections containing some information about the roles you are installing. Here, the DNS Server and AD DS roles. Take the time to read this description to significantly strengthen your learning.
7. Confirmation
In the last window, you will find a summary of what you are going to install on your server. You have the option to automatically restart the server, however in this step it is not necessarily needed, the server does not need to restart.
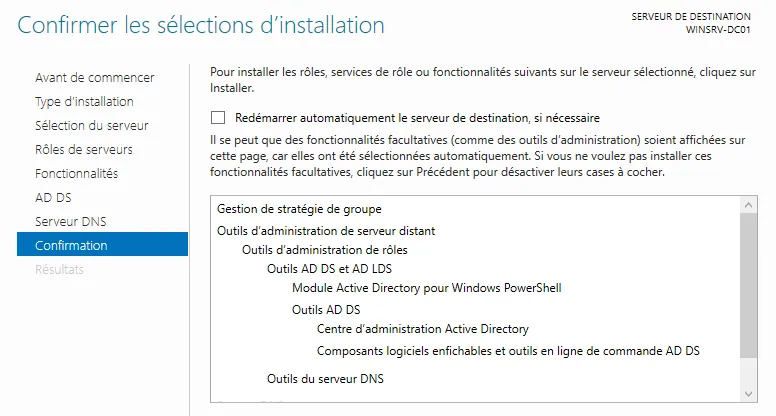
If everything seems OK to you, click "Install".
8. Results
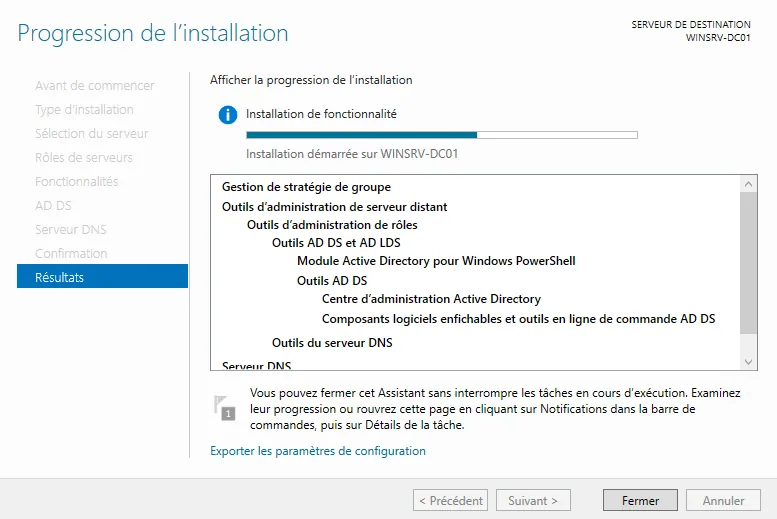
The installation of the roles and features is going to start… It will take a few minutes, then you can close the window by clicking Close.
Step 3: Deployment of the domain controller
1. Server Manager dashboard
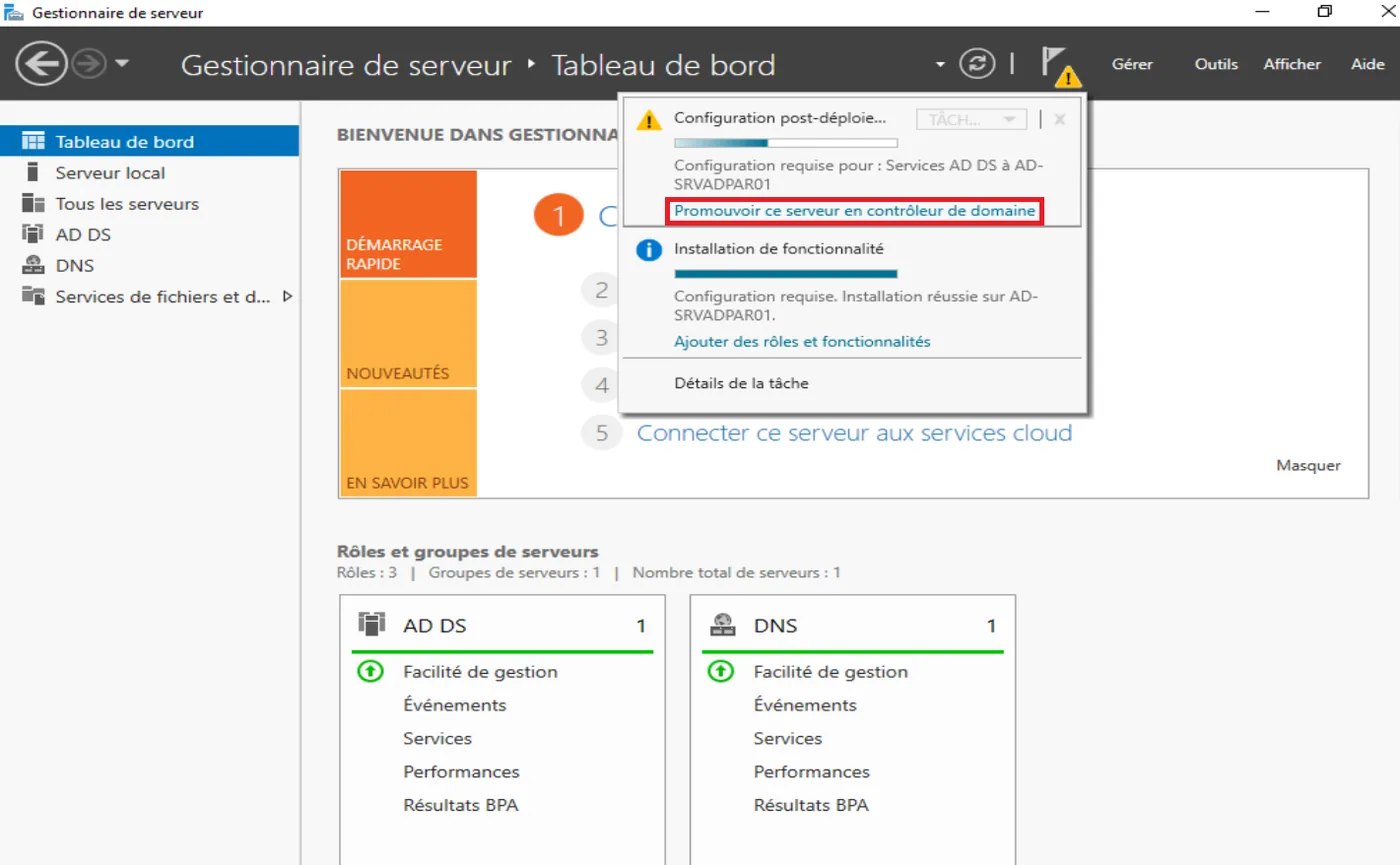
Now go back to the "Server Manager dashboard", you should find a small alert there next to the flag.
Click on it, then on "Promote this server to a domain controller".
2. Deployment configuration
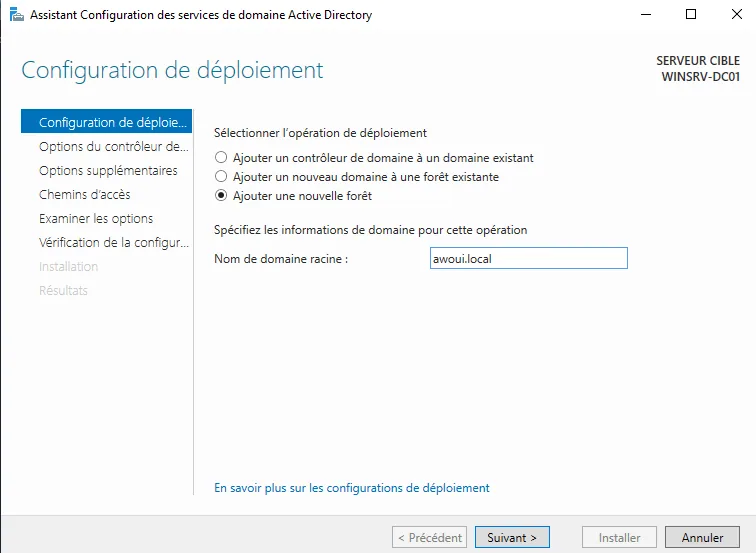
Now we are finally going to be able to create our domain and therefore create a new forest. Here, the domain will be awoui.local . We invite you to replace it with a name that suits you.
3.1 Domain controller options
The following window refers to the functional level of the forest. Indeed, a new domain controller and a new forest have just been created. It is therefore best to leave the functional level at Windows Server 2016.
However, we could very well have changed the functional level in the case where this server were joining an already existing architecture at a lower functional level.
Here, you will have to choose a directory services restore password
(DSRM - Directory Services Restore Mode).

Click "Next" to continue.
3.2 DNS option
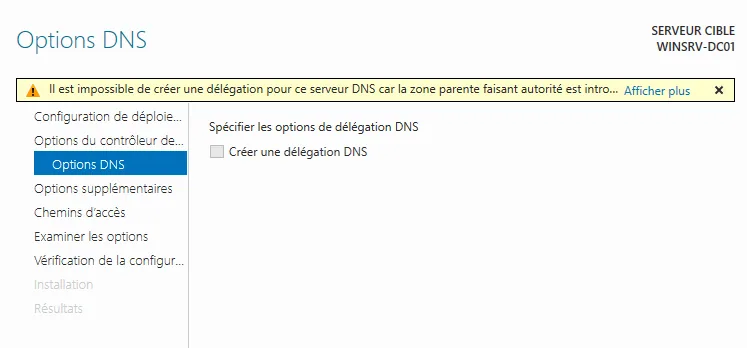
Normally, in this window you would be able to create a DNS delegation. Here, we do not have a DNS server already active, so it is logical to have this warning.
Click "Next" to continue.
4. Additional options
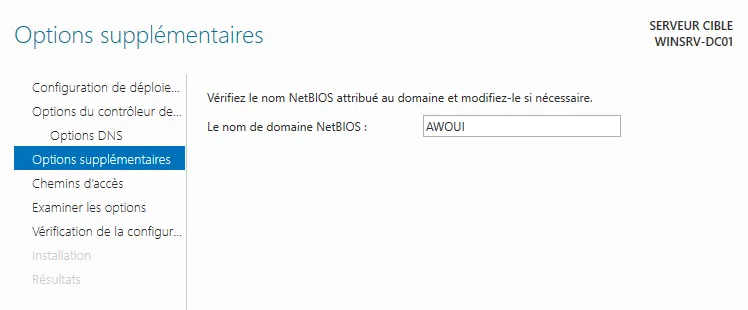
The NetBIOS name will be automatically created, you can change it if necessary and in the case where it would exceed the 15-character limit of the NetBIOS name. The best is generally to leave the default name.
Click "Next" to continue.
5. Paths
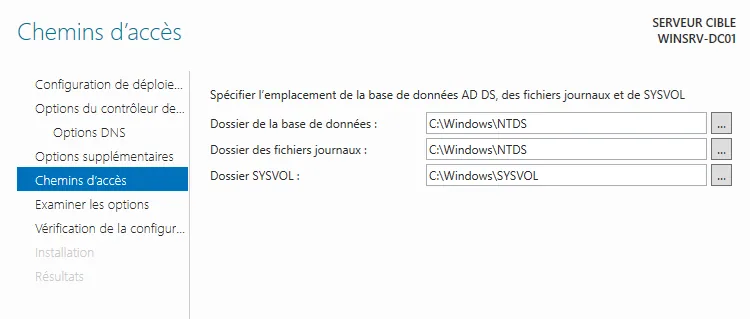
Active Directory is the grouping of a database and of log files. If you wish, you can change here the path of the DB (the database), of the logs (the log files) or of SYSVOL (all the files and folders present on the local disk of the domain controller).
You can, for example, change the location to prevent these files from being on the system disk.
Click "Next" to continue.
6. Review options
You are almost there!
Before launching the installation, you can still take a look at the selected settings. It is also possible to display the PowerShell script in order, for example, to save it and use it on a future installation (this way you will save a lot of time).
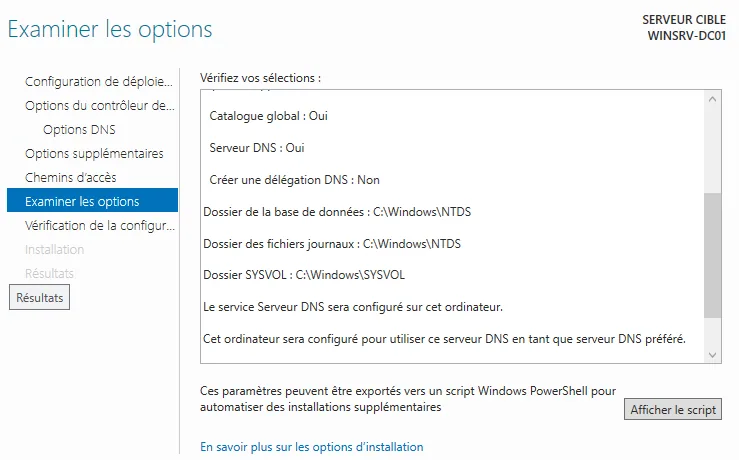
If everything is OK you can then click "Next".
7. Prerequisites check
Here we are, you have a few warnings, but that is completely normal.
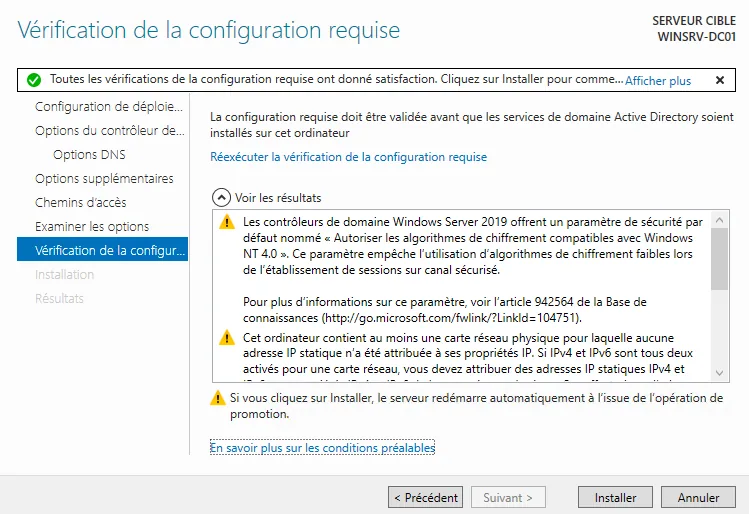
Click "Install" to launch the installation of the domain controller.
Step 4: Finalize the installation
The installation is going to run for a few minutes, then the server is going to restart if you accepted the automatic restarts earlier. Otherwise you will have to restart it manually. You will finally arrive at the login screen where you can notice the NetBIOS name of the domain present in front of the user name: AWOUI\Administrator.
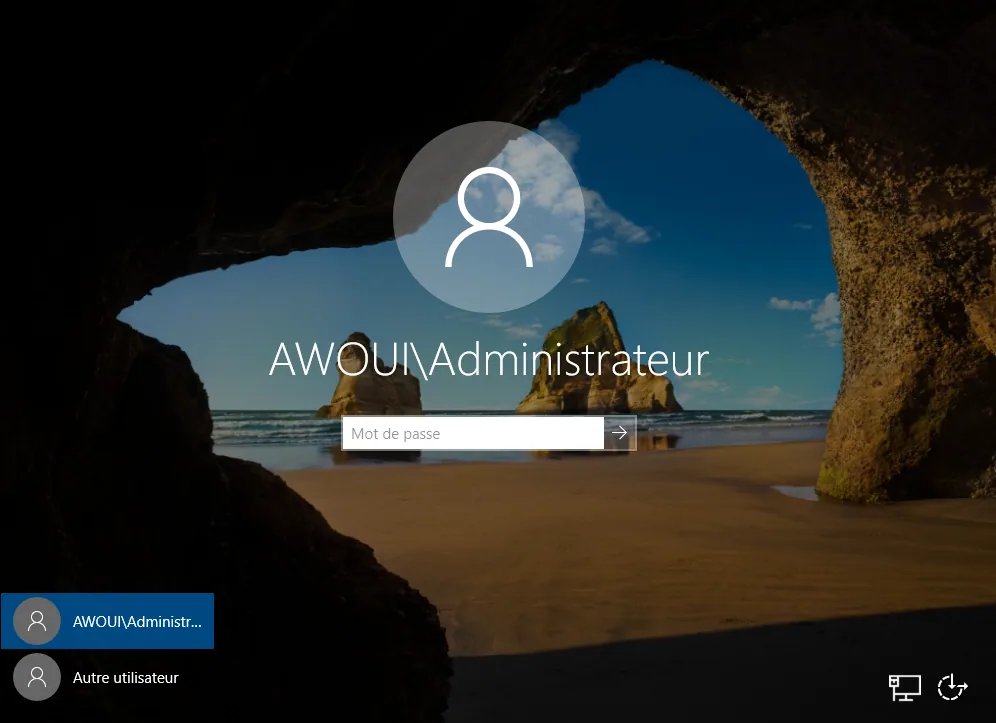
The password of the domain administrator is identical to the password of the local administrator.
More to follow soon...